One-click proxy IP batch assignment to Environment Manager
Mbbrowser One-click Proxy IP Batch Assigned Yo The Environment Manager Use The Foregoing
In the scenario of creating environments in batches, the current mbbrowser supports two scenarios: importing your own environments in batches through EXCEL and creating new environments in batches with one click. In actual business operations, if you do not create EXCEL yourself, you do the first environment creation through the one-click batch creation of new environments by migratory birds. During this process, if you do not enter the proxy IP address in EXCEL, you may want to flexibly match your multiple proxy server IP addresses to the newly created environment. The one-click proxy IP address is assigned to the environment manager to provide this support. This manager prevents you from having to add your own proxy IP to the environment one by one after creating the environment in bulk in earlier releases [before 4.9.70.156].
Video Tutorial
| One-click proxy IP batch assignment to Environment Manager |
|---|
I、Enter One-click Proxy IP Batch Assigned Yo The Environment Manager
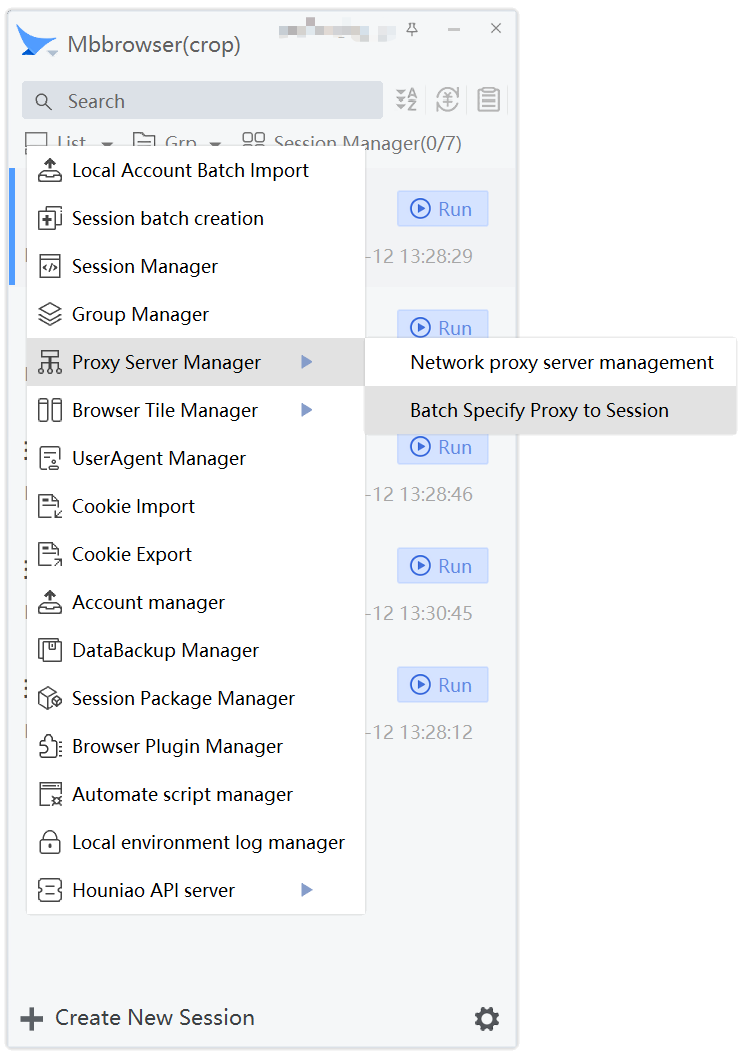
Method 1: On the main panel of Mbbrowser, click List -> Proxy Server Manager -> Batch Specify Proxy to Session
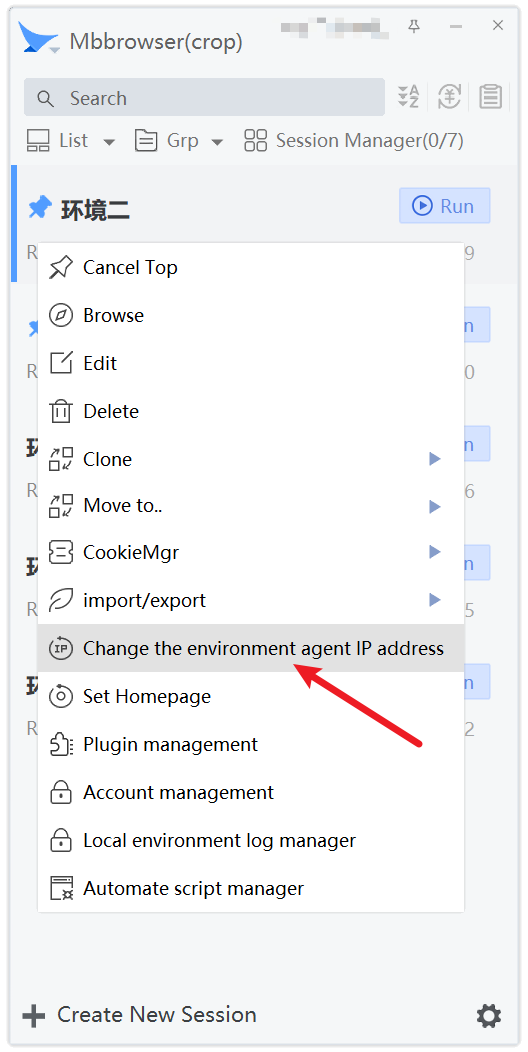
Method 1: Right-click the environment on the Mbbrowser main panel and choose Change the environment agent IP address
Method 2: Hold down the CTRL key on the environment of the main panel of the Mbbrowser, click the environment one by one, select the environment to be changed in multiple selection mode, and click Change the environment agent IP address
II、One-click Proxy IP Batch Assigned Yo The Environment Manager Use Methods And Precautions.
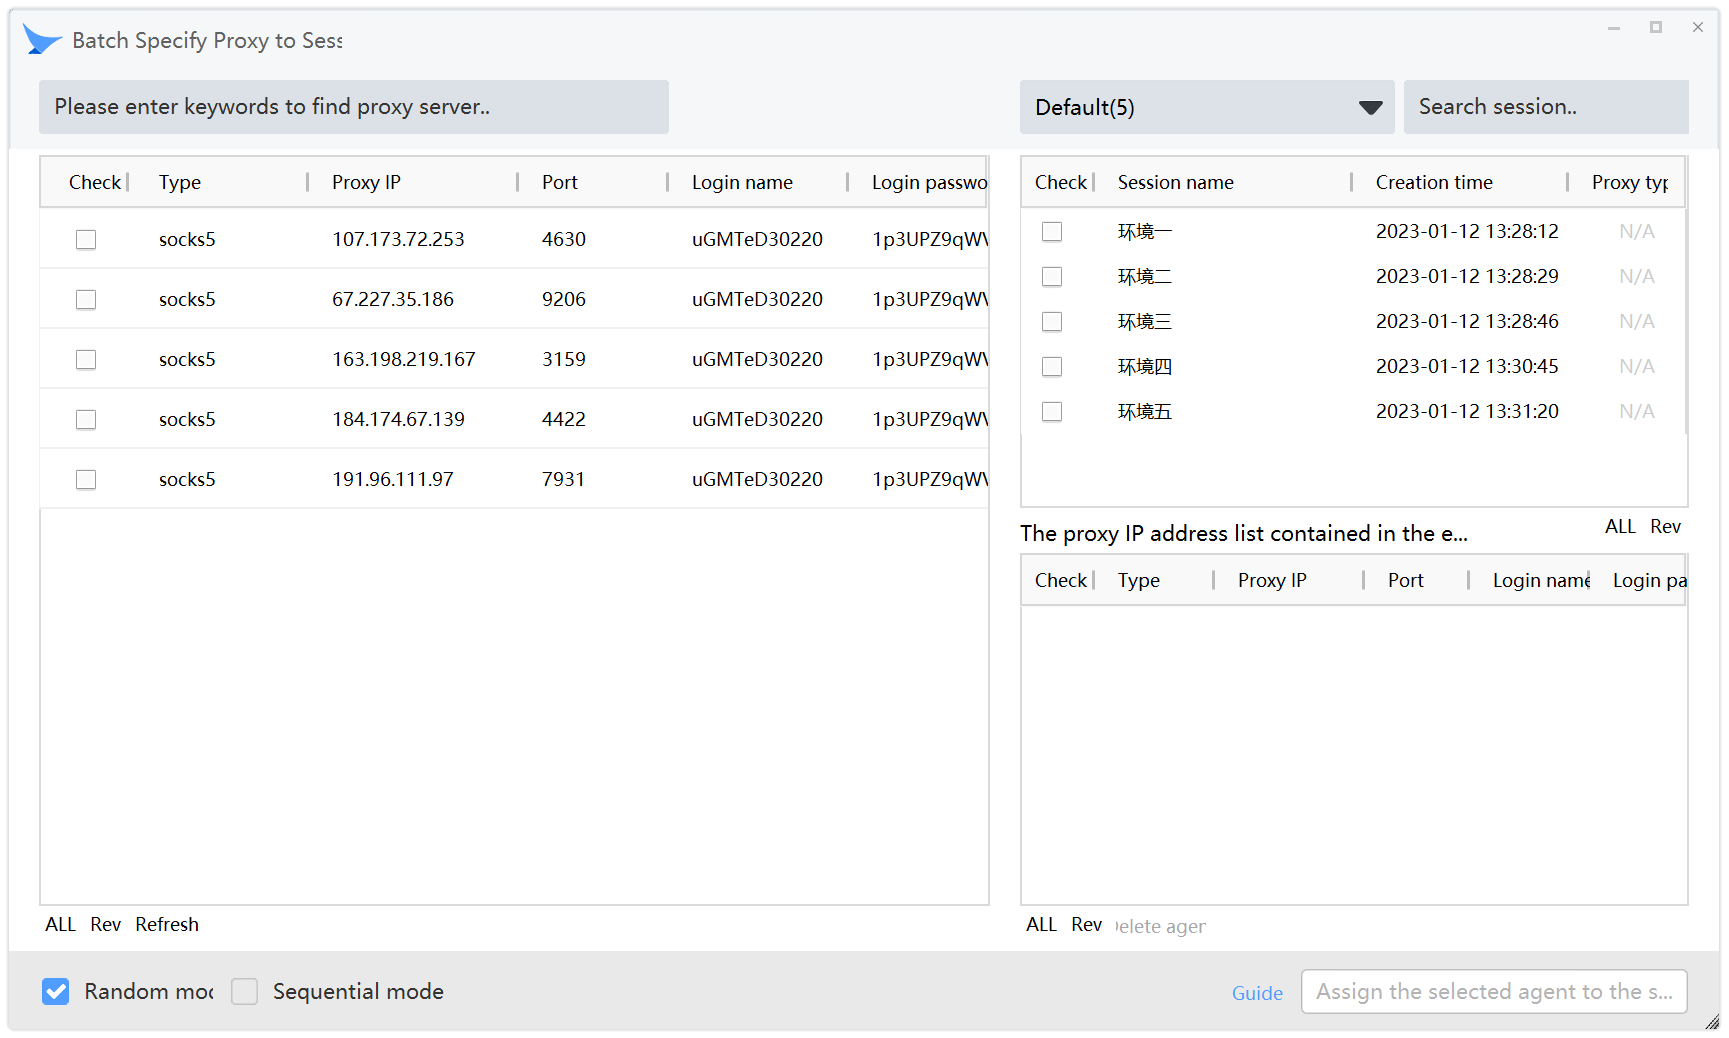
Convention: From left to right, from top to bottom, the list area is divided into large areas A,B, and C.
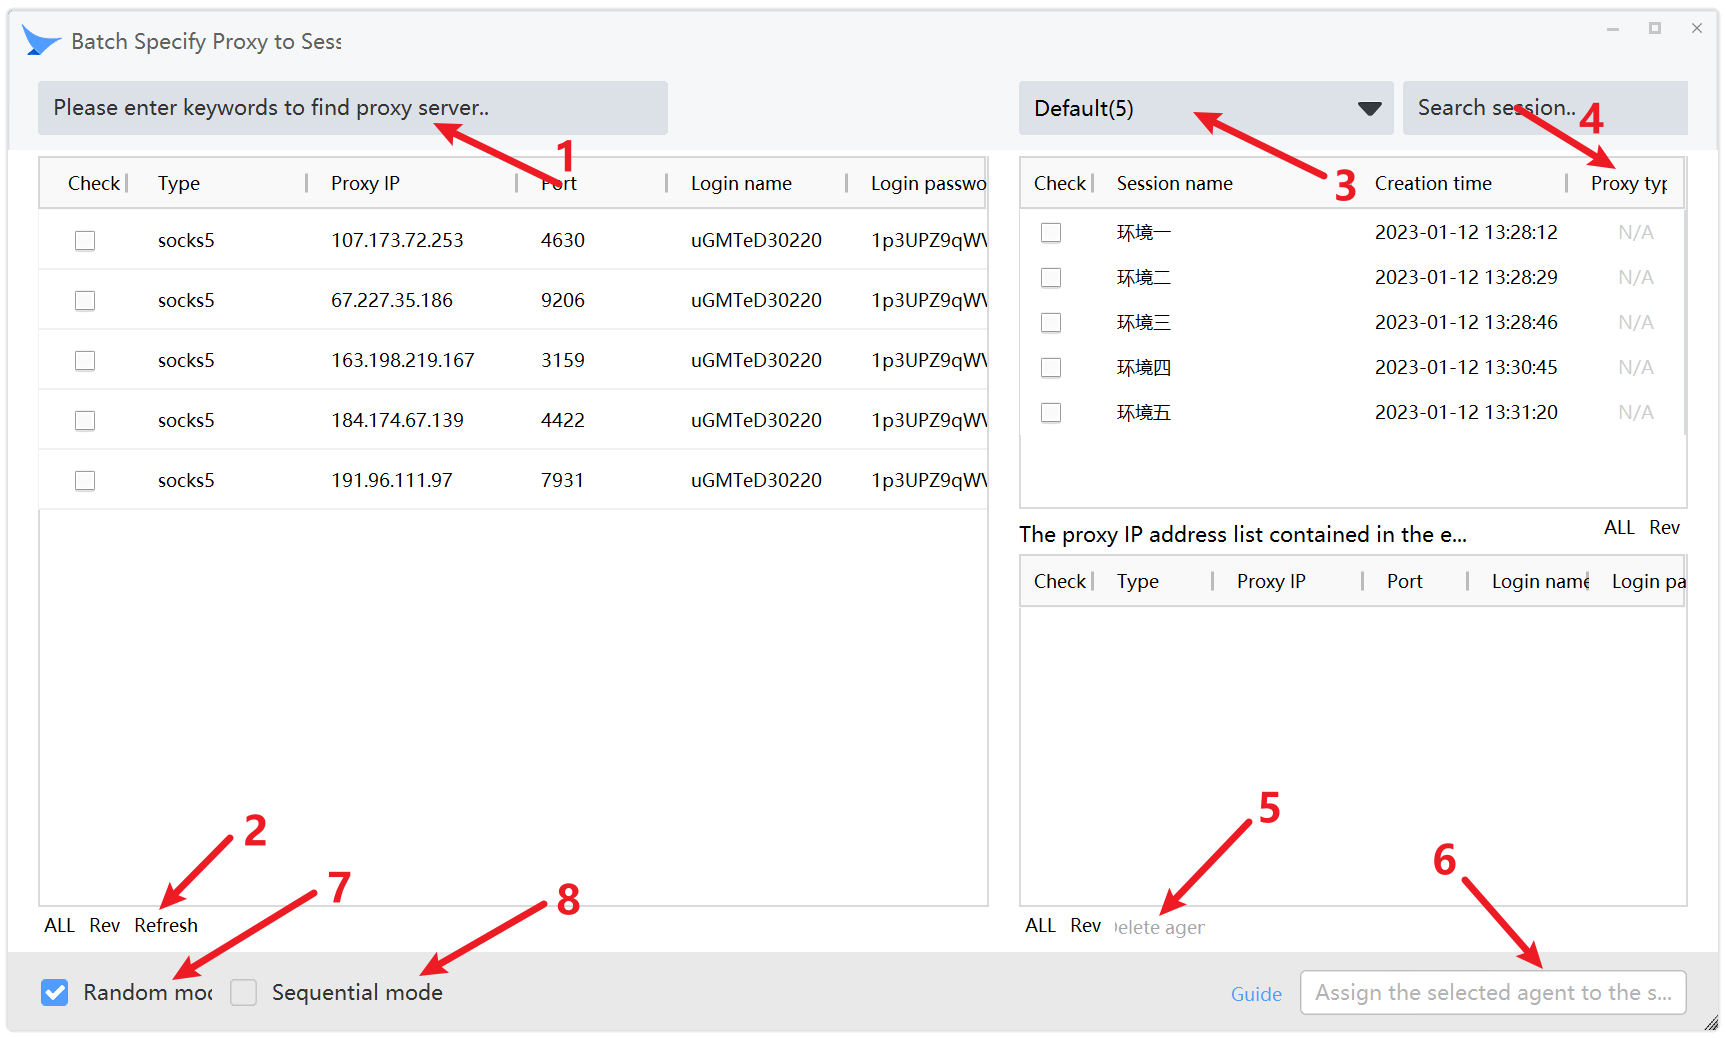
Arrow 1:Allows you to search by searching proxy keywords.
Arrow 2:Click the refresh button to reload the data in area A of the PROXY list and update the list in real time.
Arrow 3:When you go directly to this screen, the existing proxy drop-down list is displayed by default.
Arrow 4:This column shows the agent category, or N/A if no agent exists in this environment.
Arrow 5:The agents in the selected environment are listed in area C. The agent deletion function deletes the agents in the selected environment. The Delete Agent button lights up automatically when you select the agent you want to delete.
Arrow 7:The random assignment mode is the default mode: When A user is assigned from zone A to Zone B, all proxy IP addresses are randomly assigned to each environment.If the number of zone A is smaller than that of zone B, all proxy IP addresses of zone A must be assigned to the environment of zone B.
Arrow 8:In the sequential assignment mode, when A user is assigned from zone A to zone B, all proxy IP addresses are sequentially assigned to each environment. The characteristics are as follows: If the number of area A is less than that of area B, after area A is allocated to Area B, there will still be some unallocated parts in area B. At this time, you need to take the proxy IP address of Area A to continue to allocate the remaining parts in area B.
Arrow 6:Perform the above setup procedure from Zone A -> Zone B -> Zone C, arrows 1-8.
Note:If the proxy IP address already exists in your environment, the existing proxy IP address will be replaced after the preceding operations.
After you assign your valid proxy IP to the environment in batches through this manager, it is recommended to check the environment configuration before using each environment, and make sure that the proxy IP you assign matches your environment correctly.