# Bulk Local Account Import Using
# Mbbrowser Import local accounts in batches
Mbbrowser supports batch local account import. With one click, commercial accounts purchased in bulk can be imported to the migratory bird environment for immediate use. Mbbrowser supports unlimited order of magnitude account one-click import generated into a business environment. Agent account management, login account management, session COOKIE management, and environment configuration status of all environments are clear. Multiple accounts, agents, and cookies can be assigned to massive environments in batches with one key and take effect in real time. The batch configuration of massive environments only takes a few seconds to complete, completely abandoning the previous complex environment configuration, account addition, maintenance and other business routine management.
# Mbbrowser Use the preceding methods to import browser accounts locally in batches
The dedicated commercial kernel of the Migrating Bird browser developed based on Google chrome enables the service of batch account import. Users can import an unlimited number of accounts into the Migrating Bird Browser through the intuitive import guide window to generate various business environments. You can modify and adjust accounts in batches before importing them to the Migrating Bird Browser. You can also batch configure, expand, and dynamically adjust massive environments in the generated environments after import. Environment data is stored in the local bank-level 256-bit encryption mode, which ensures 100% data leakage. With 3 million official commercial UA libraries (which are regularly updated by Migratory Bird officials to ensure the security of your business), Migratory Bird Browser provides you with the best operating system, language, time zone, country, region, and pure dynamic/static IP to protect your business when configuring the environment. Avoid greatly modified CHROMIUM kernel with high stability performance and high security performance, keep consistent with all the underlying modules and application layer modules of GOOGLE, so as to ensure the high stability of external website servers for your business operation.
The following is a detailed description of the batch import of migratory bird browser accounts in graphic mode:
# Enable and import local accounts in batches
Start the Migratory Bird client, click the function menu at the upper left corner of the main panel, select Local Account Batch Import and click to enter the Local Account Batch Import window.
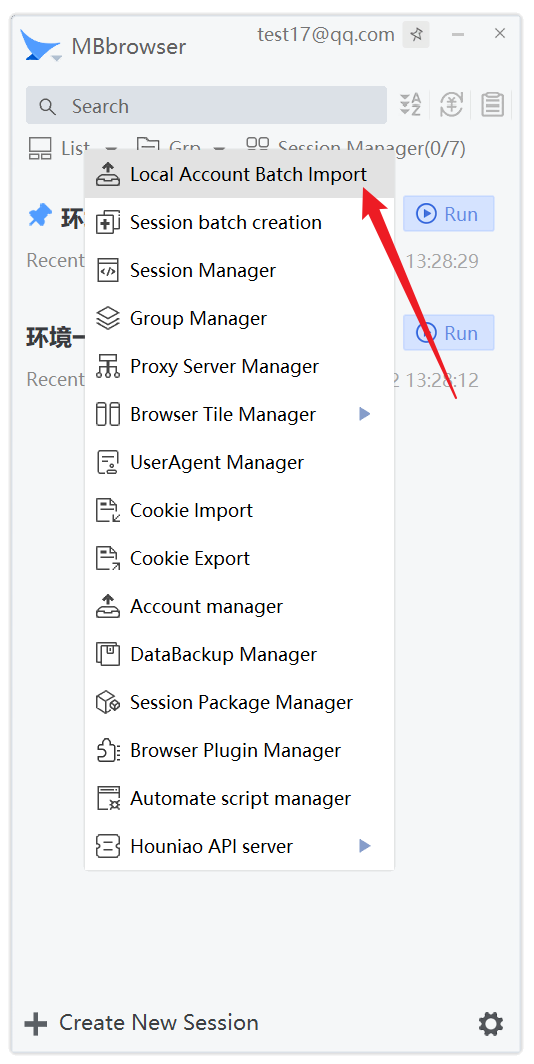
Import local accounts in batches:
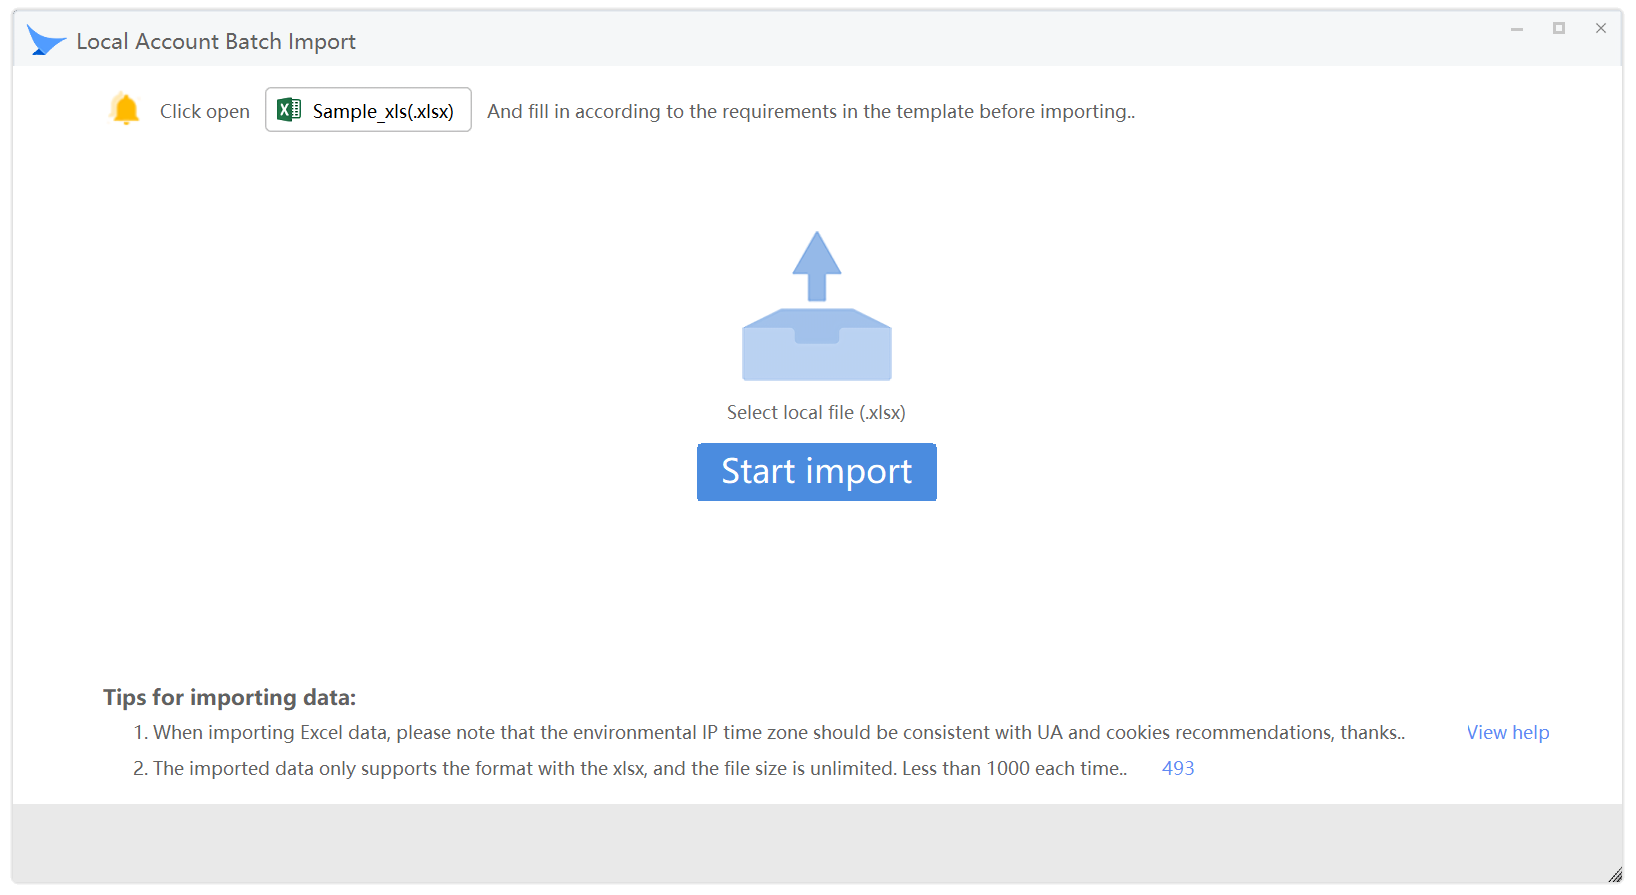
Explanation: On this screen, you can see the small orange bell in the upper left corner of the dynamic beat, there is a button on the right: Environment Import Template (xlsx). Click this button to automatically call excel software of office to open this file. **Paste your purchased account data into this file. **
As shown below:

Warm tips: **Note here: When you save this EXCEL file, it is recommended to use save as to the desktop and rename the XLSX file. **
After confirming that your data is glued to EXCEL and saved, click this button to start importing:
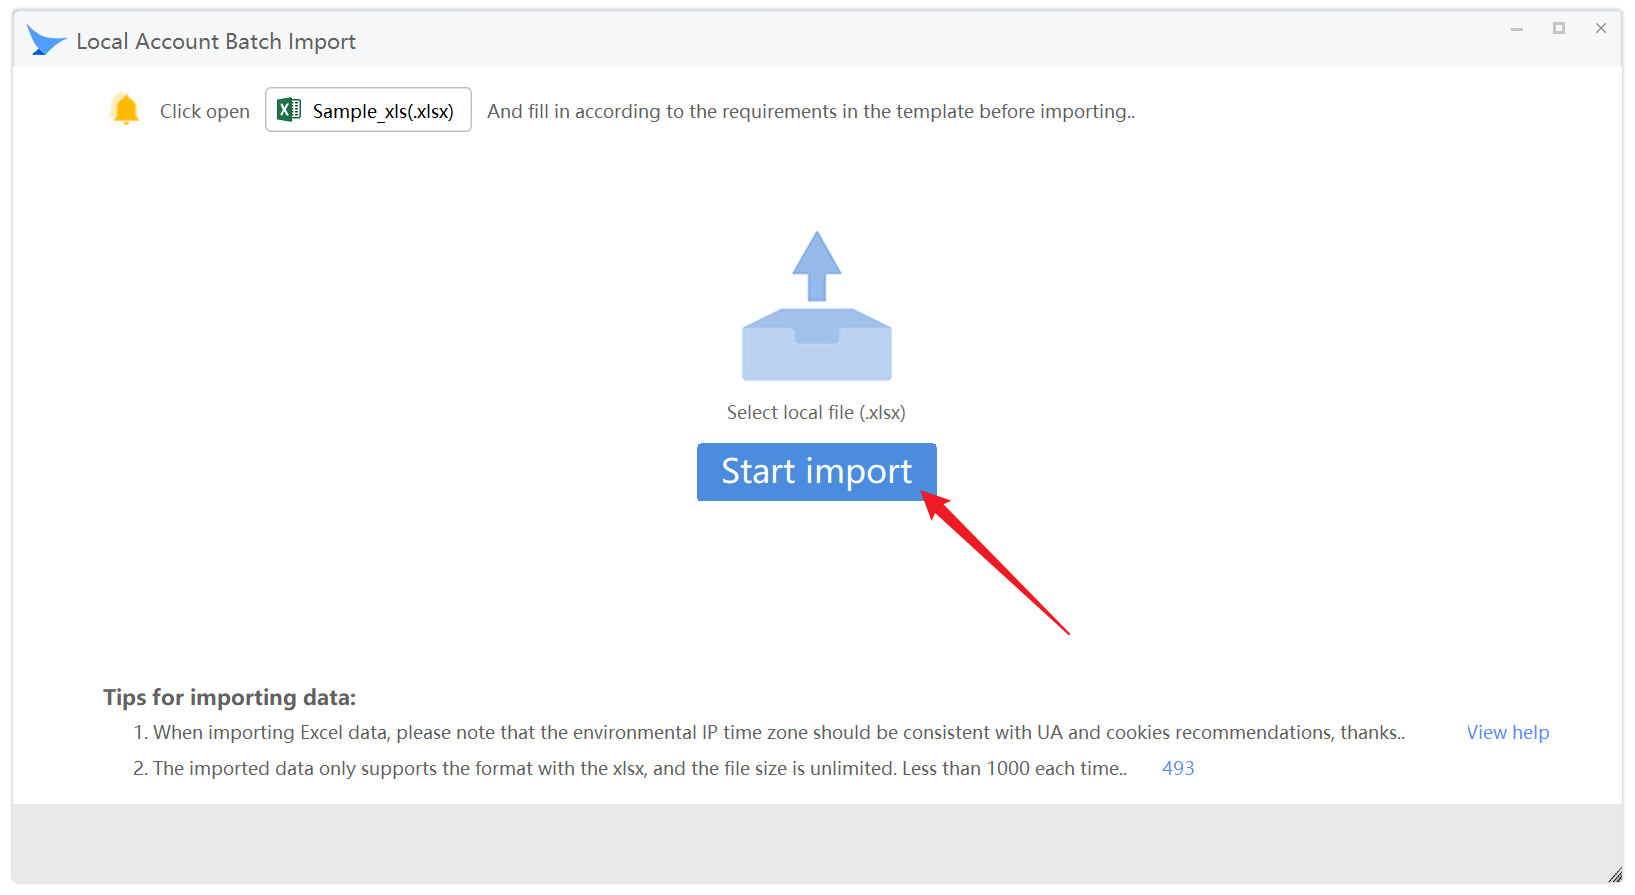
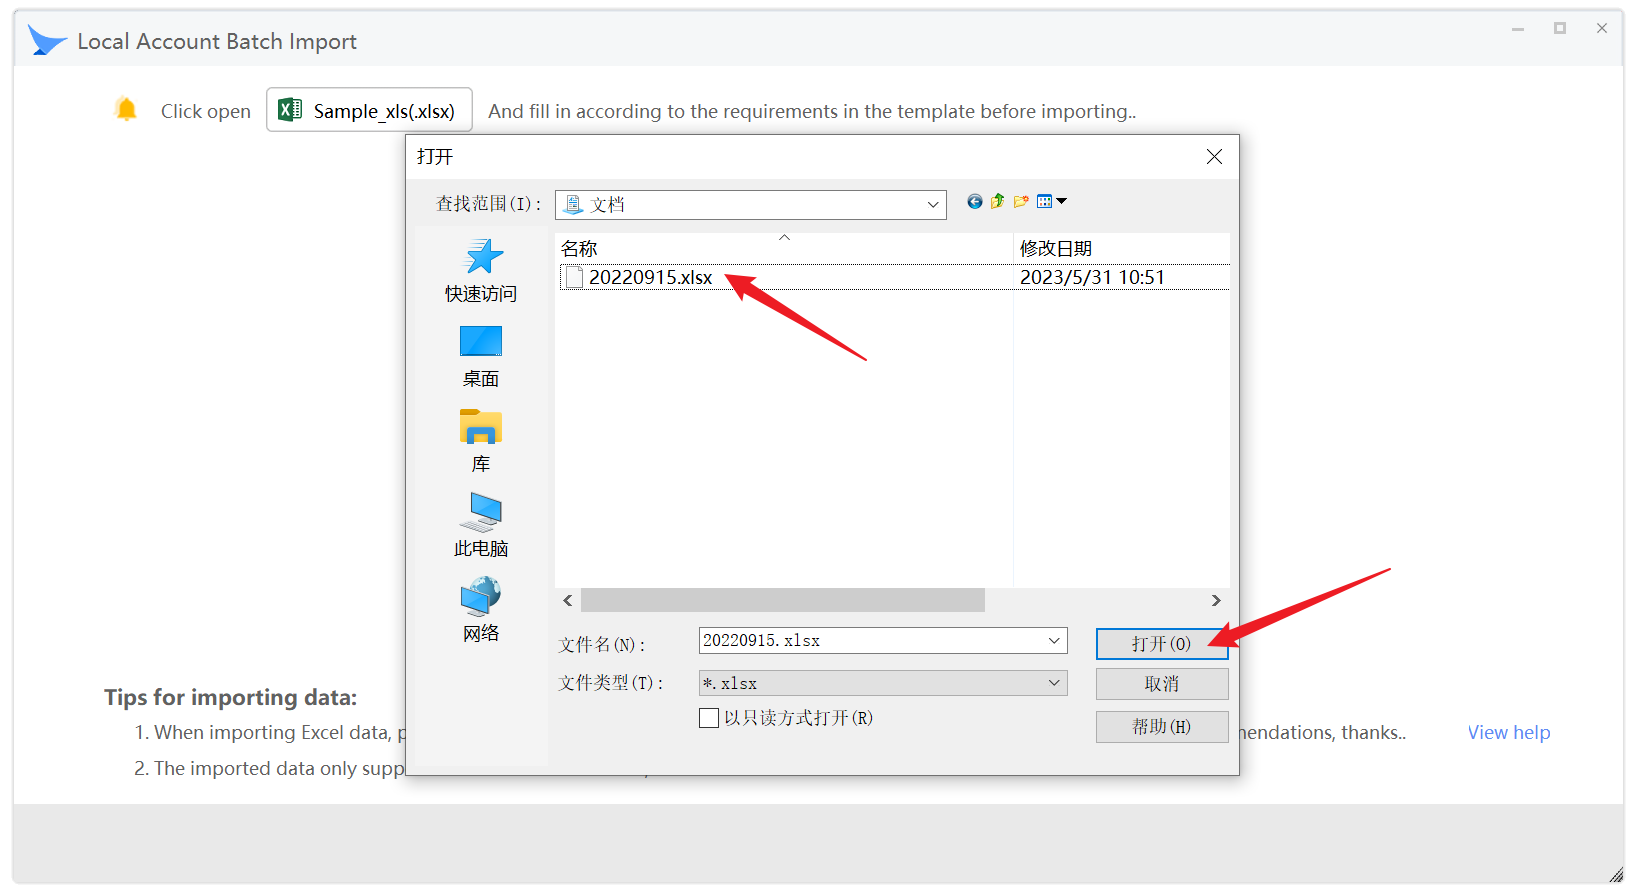
Locate the EXCEL file you just saved, select it, and click Open.
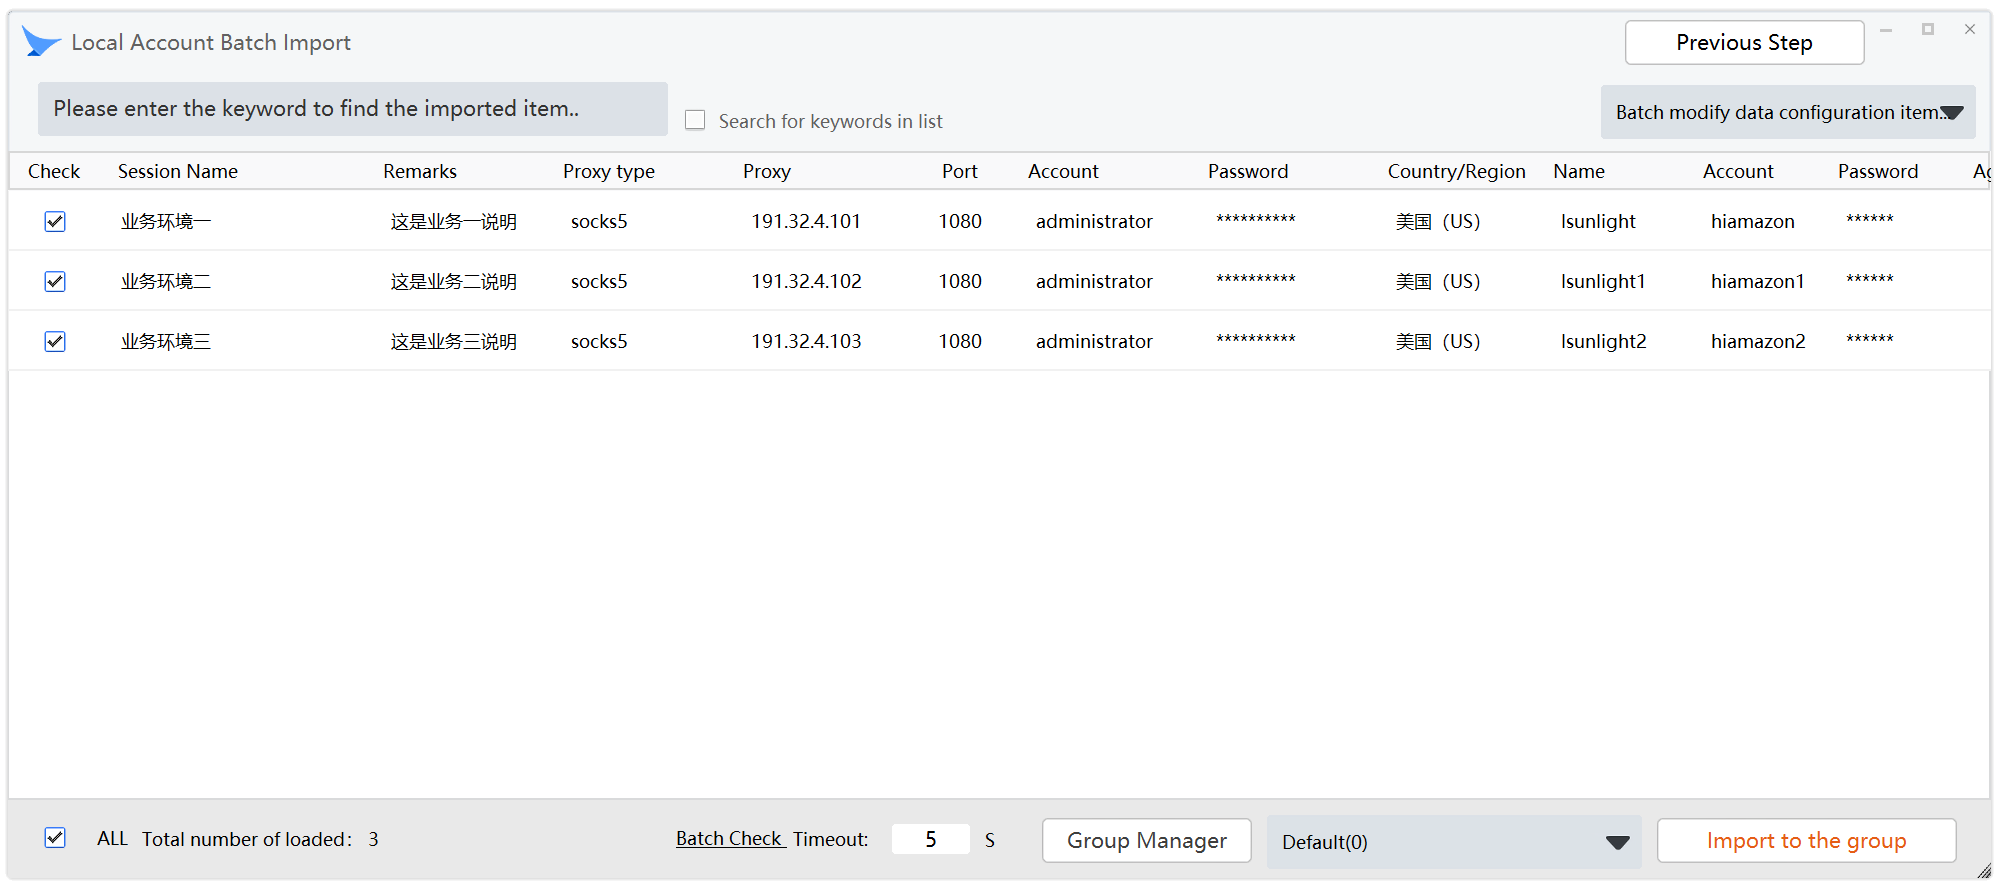
At this point, you can see that Migratory Bird has successfully preloaded all EXCEL data correctly and is displayed.
Start checking that the values in the list match your requirements.
# Local account batch import form description
- When the amount of imported data is large, you can directly find important imported items and check whether the data is correct through the search function in the upper left corner.
- If the imported data does not meet your expectations and you need to modify EXCEL and import again, you can click the upper right corner to return to the previous layer/re-import for the second import operation. When you return to the previous layer, the list data loaded in the previous form will be automatically discarded and waiting for you to import again.
- Batch import through a local account. In this form, you can modify the column data of a single item to be imported or batch modify the data of multiple items to be imported.
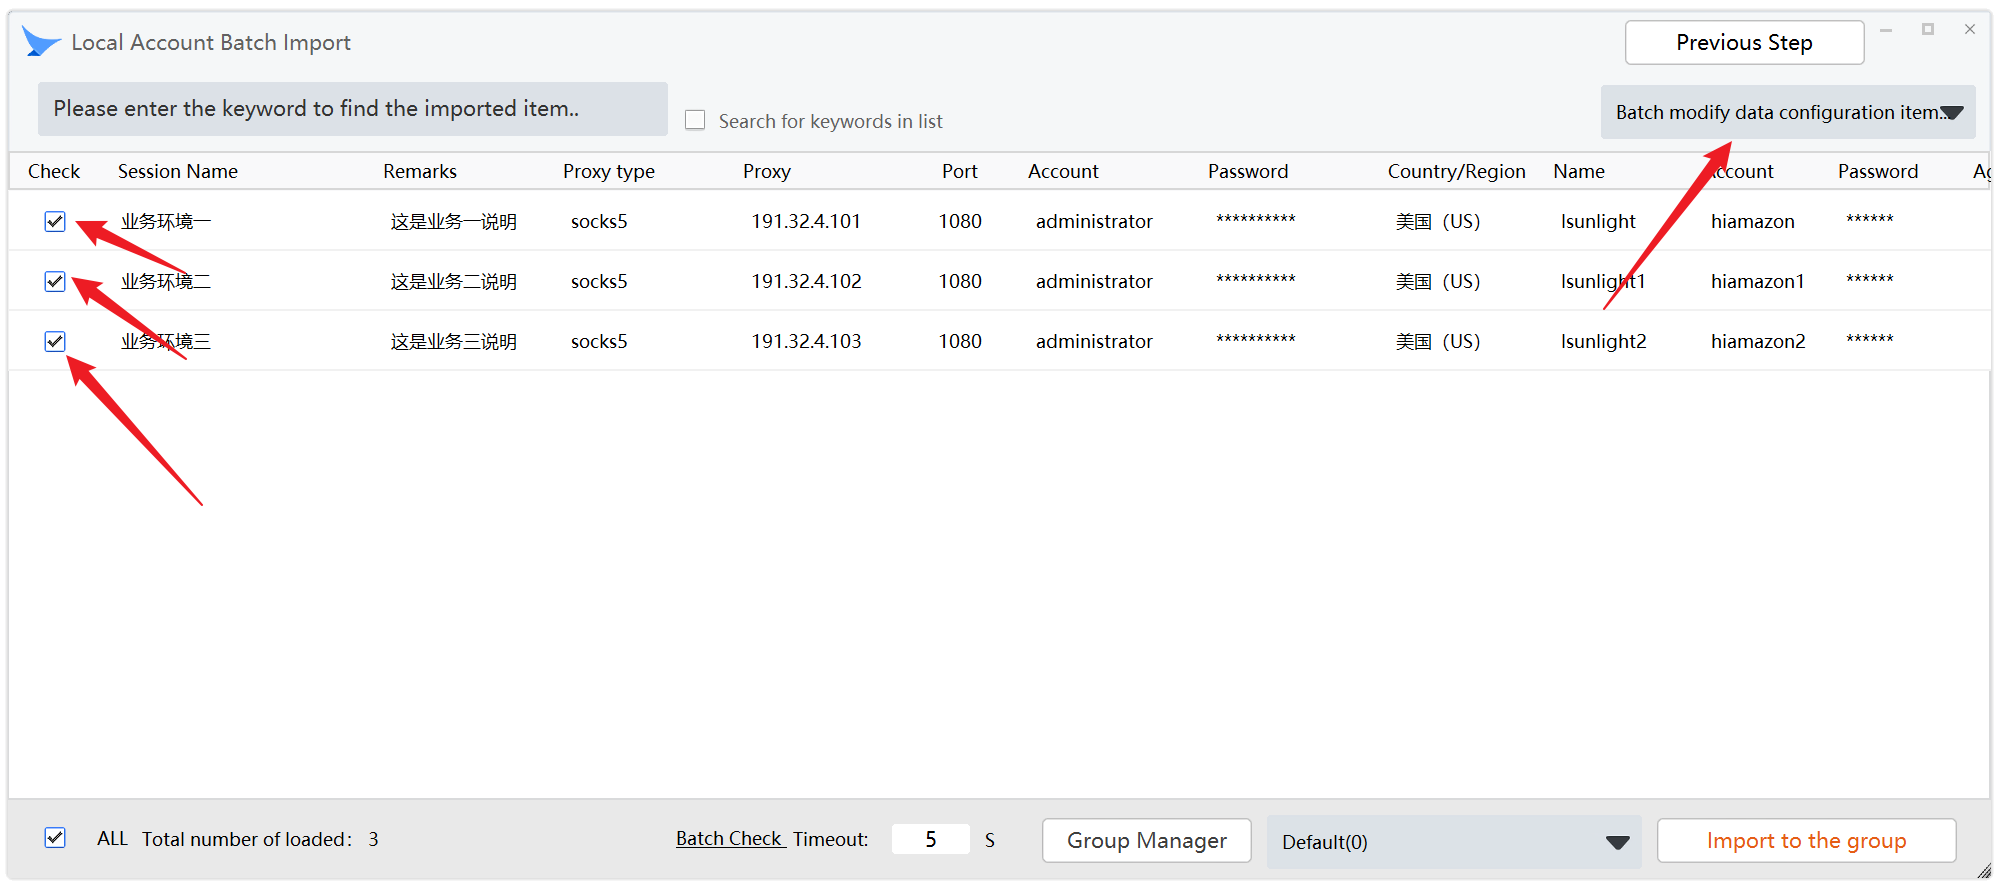
**Select the items you want to modify and the drop-down list in the upper right corner of the window will light up. Click the drop-down list. **
The following is a description of each: A. Update selected environment names in batches.
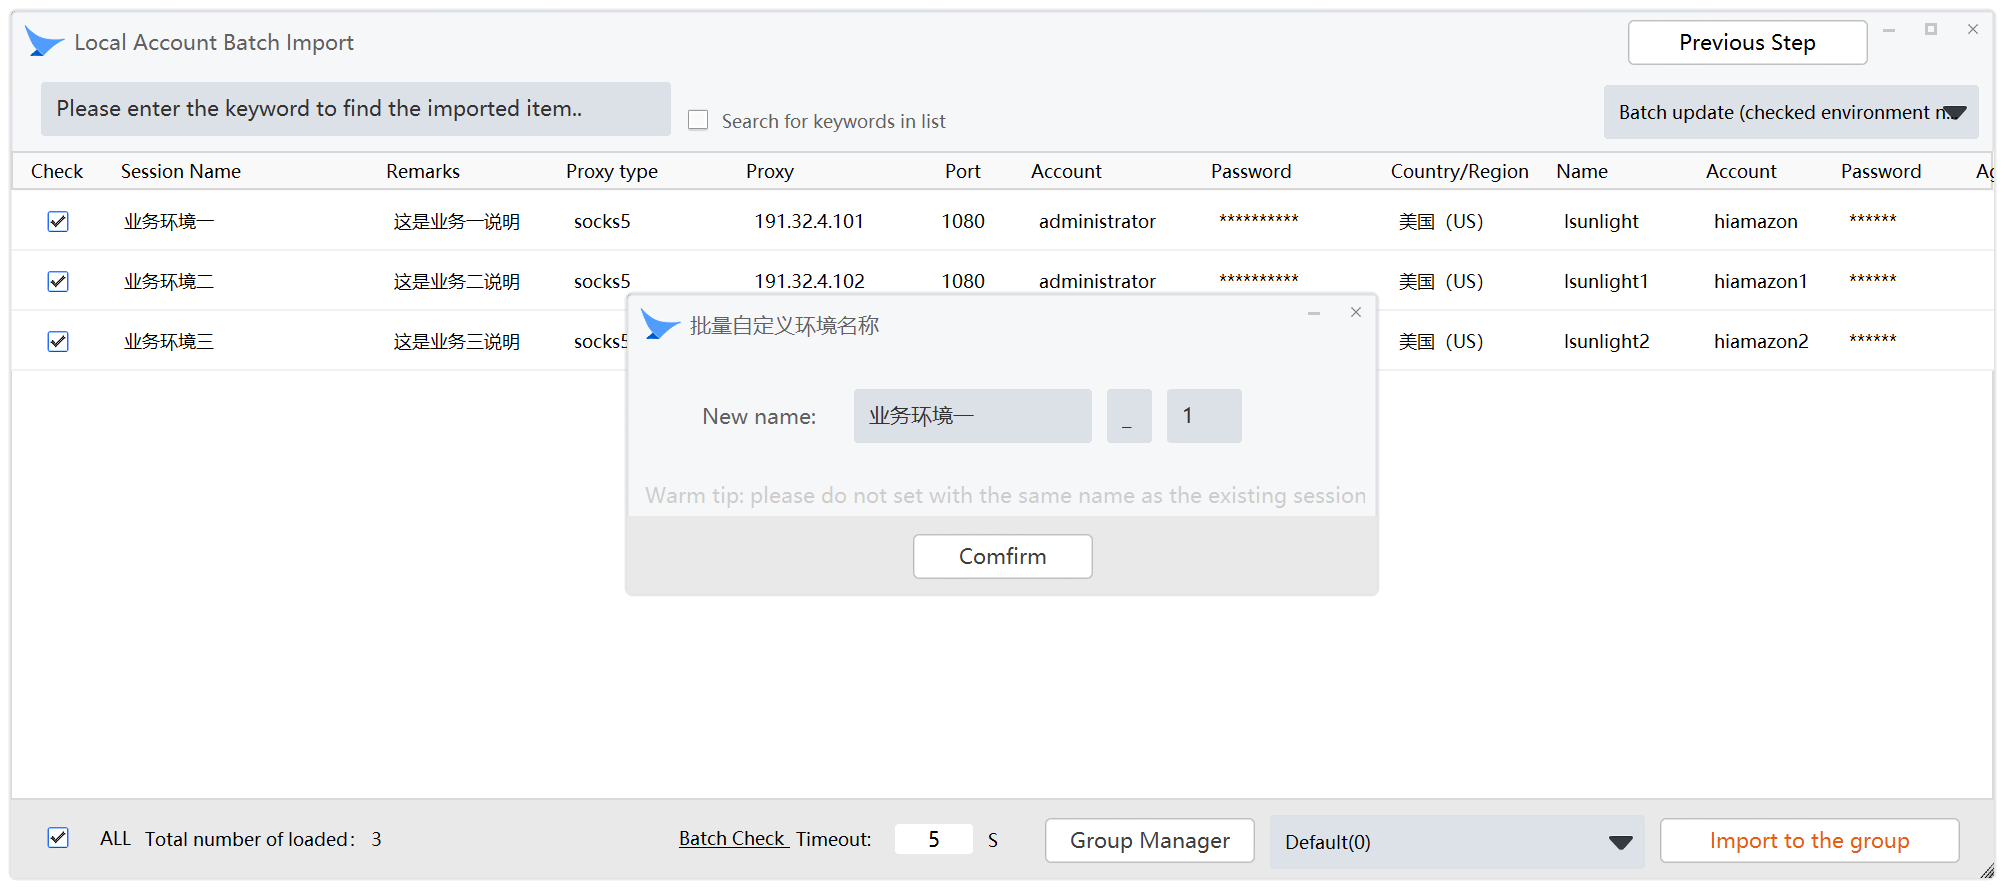
This function updates all environment names of the items to be imported in batches, increasing in number.
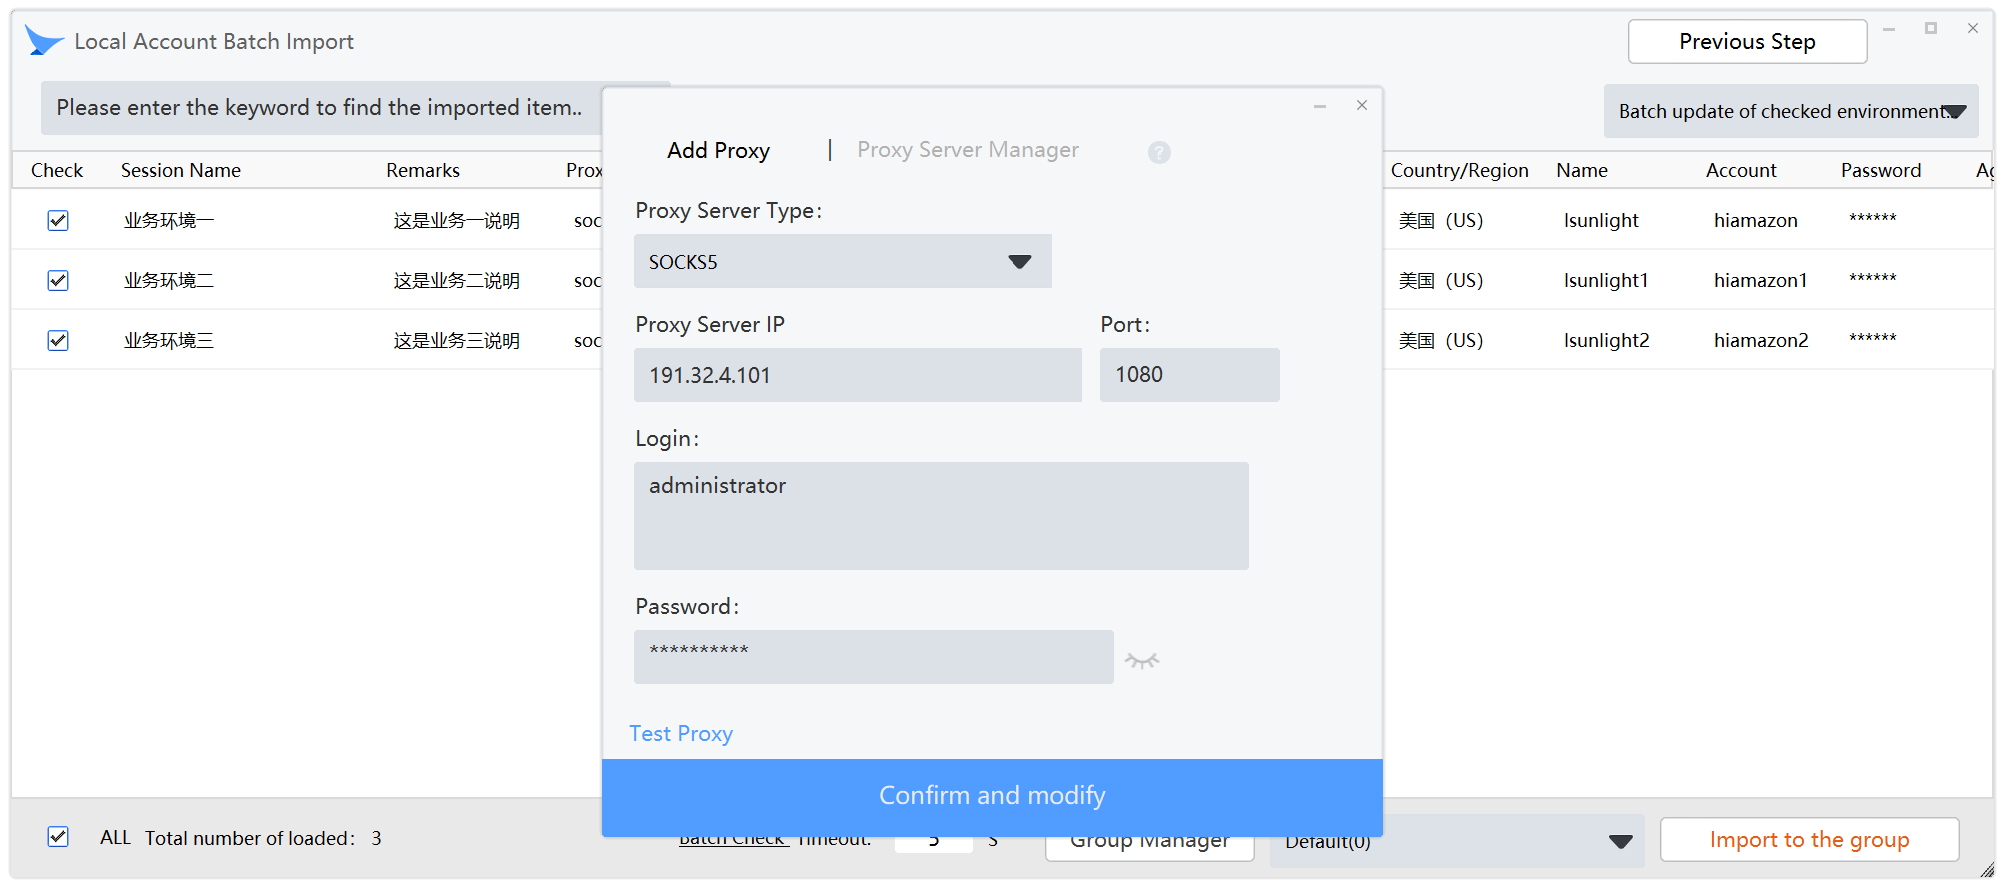
B. Batch update the selected environmental agent configurations. This function can replace the selected proxy values in batches.
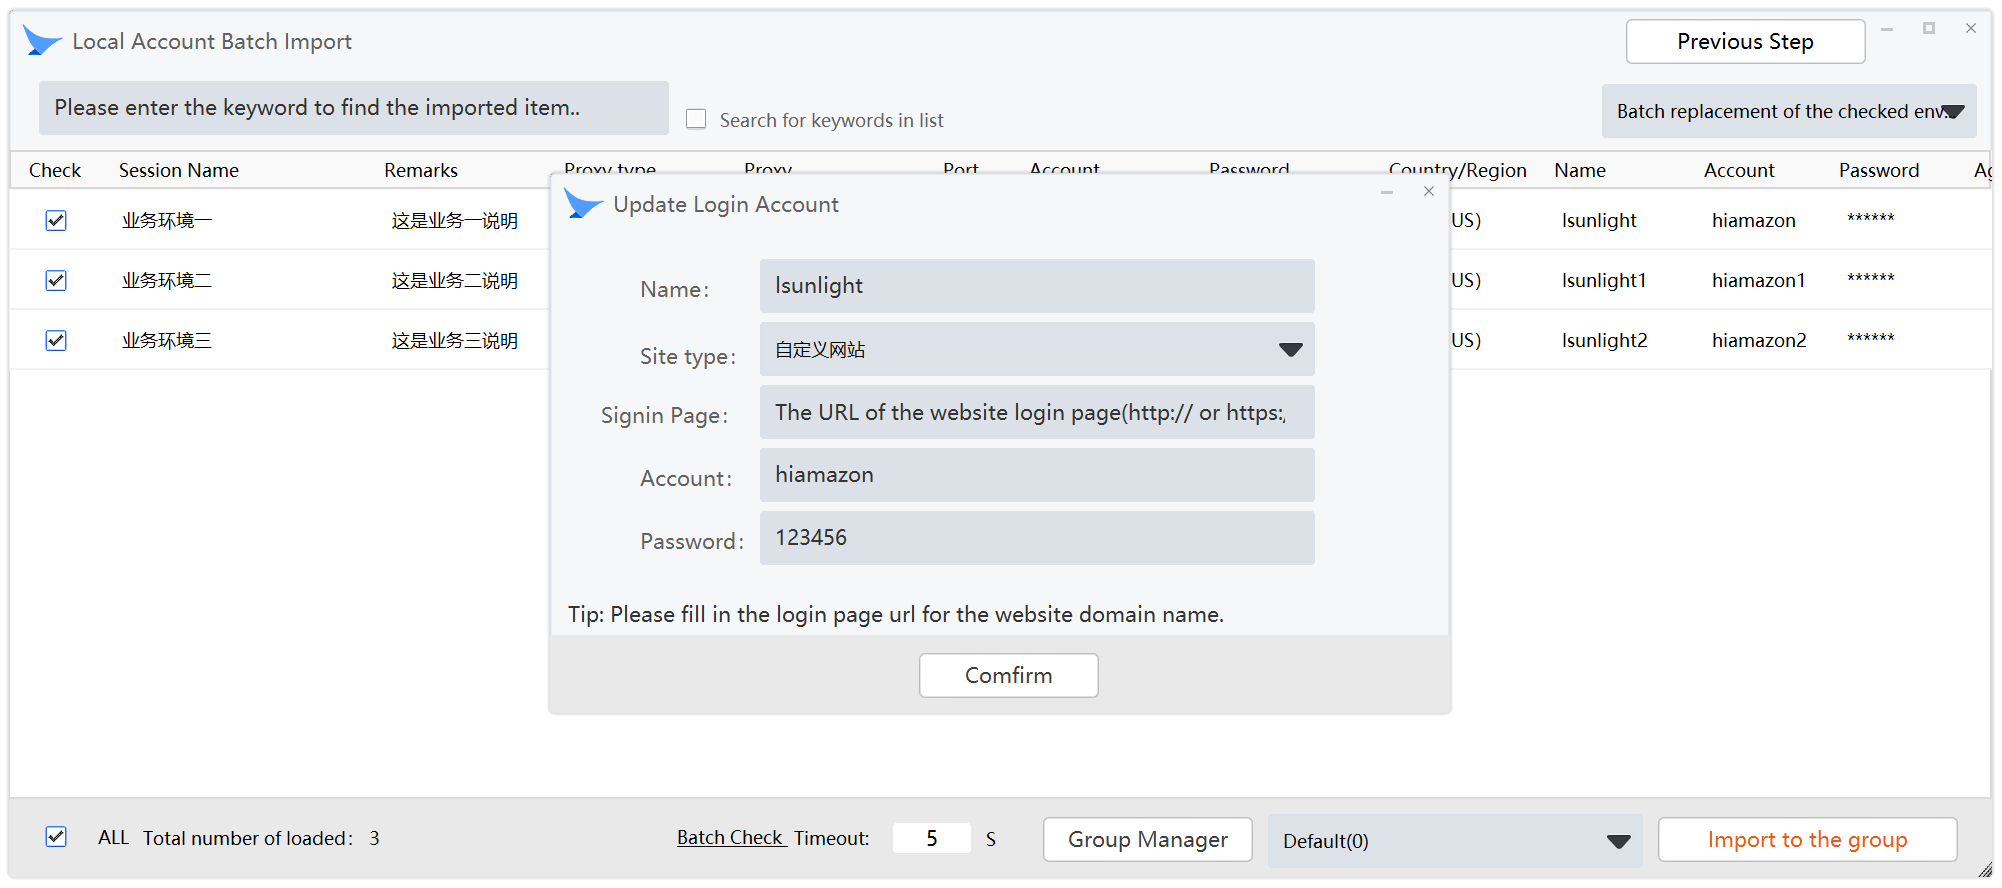
C. Change the environment login account. This function replaces the selected login account values in batches.
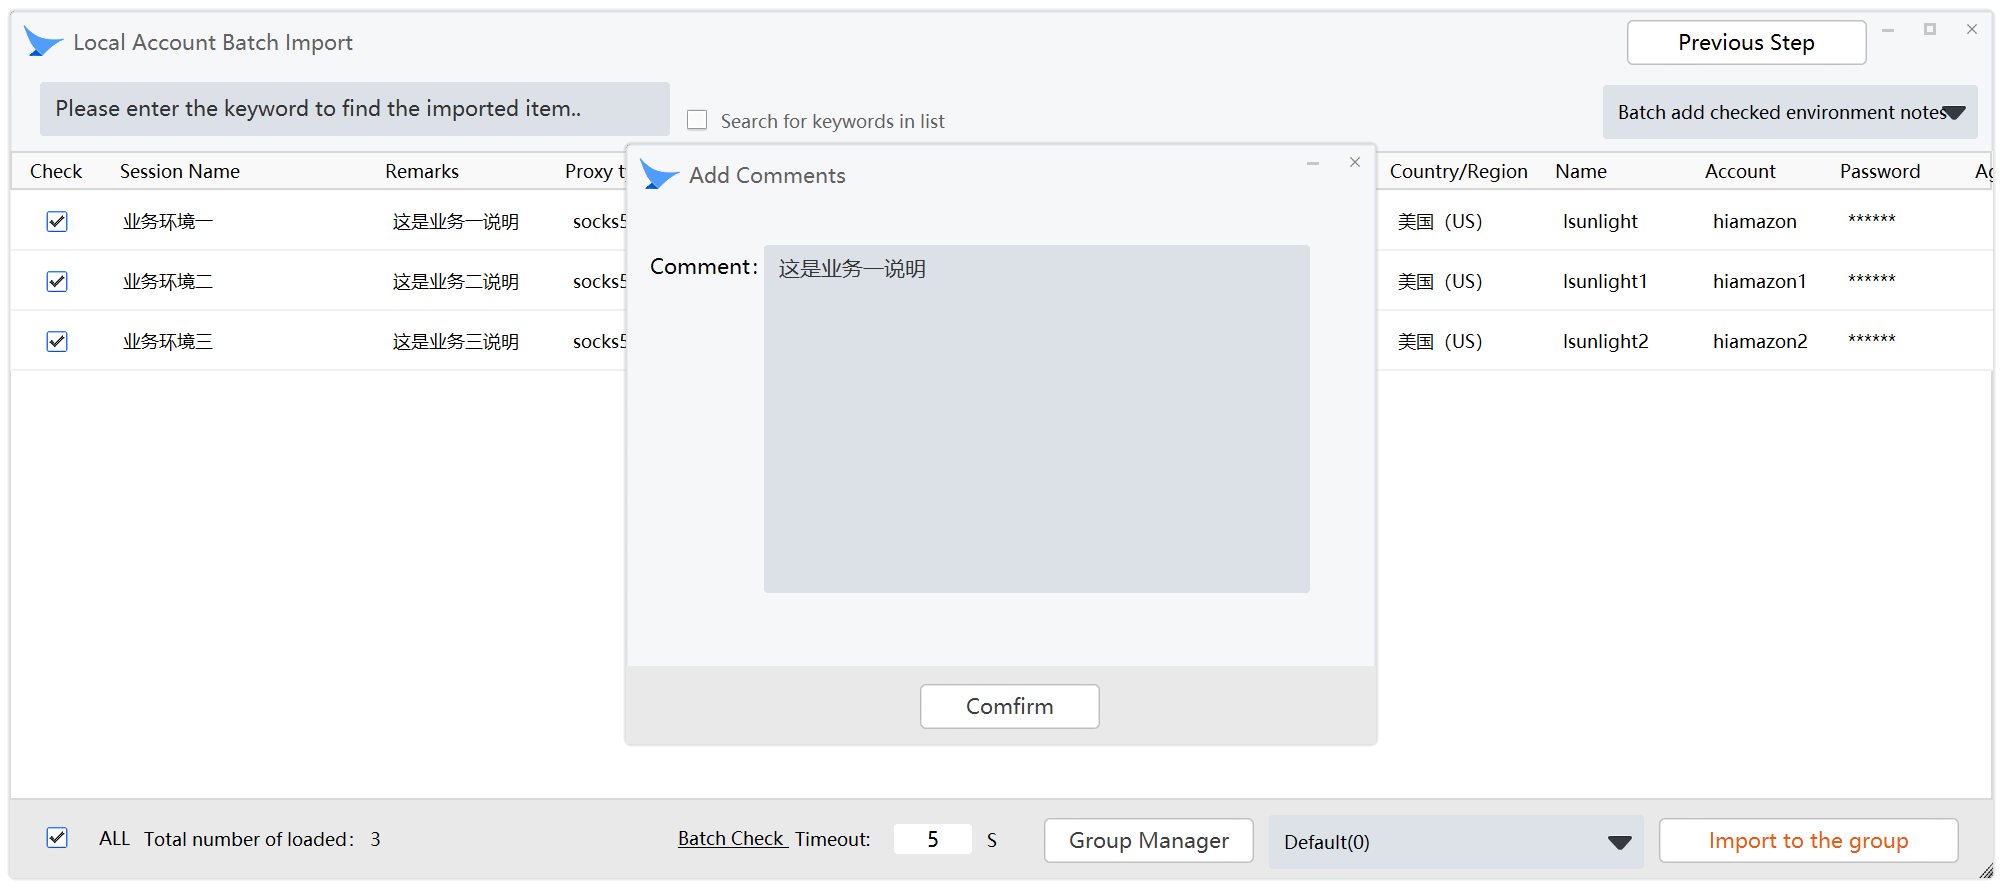
D. Update environment comments. This function can replace environment comments of selected items to be imported in batches.
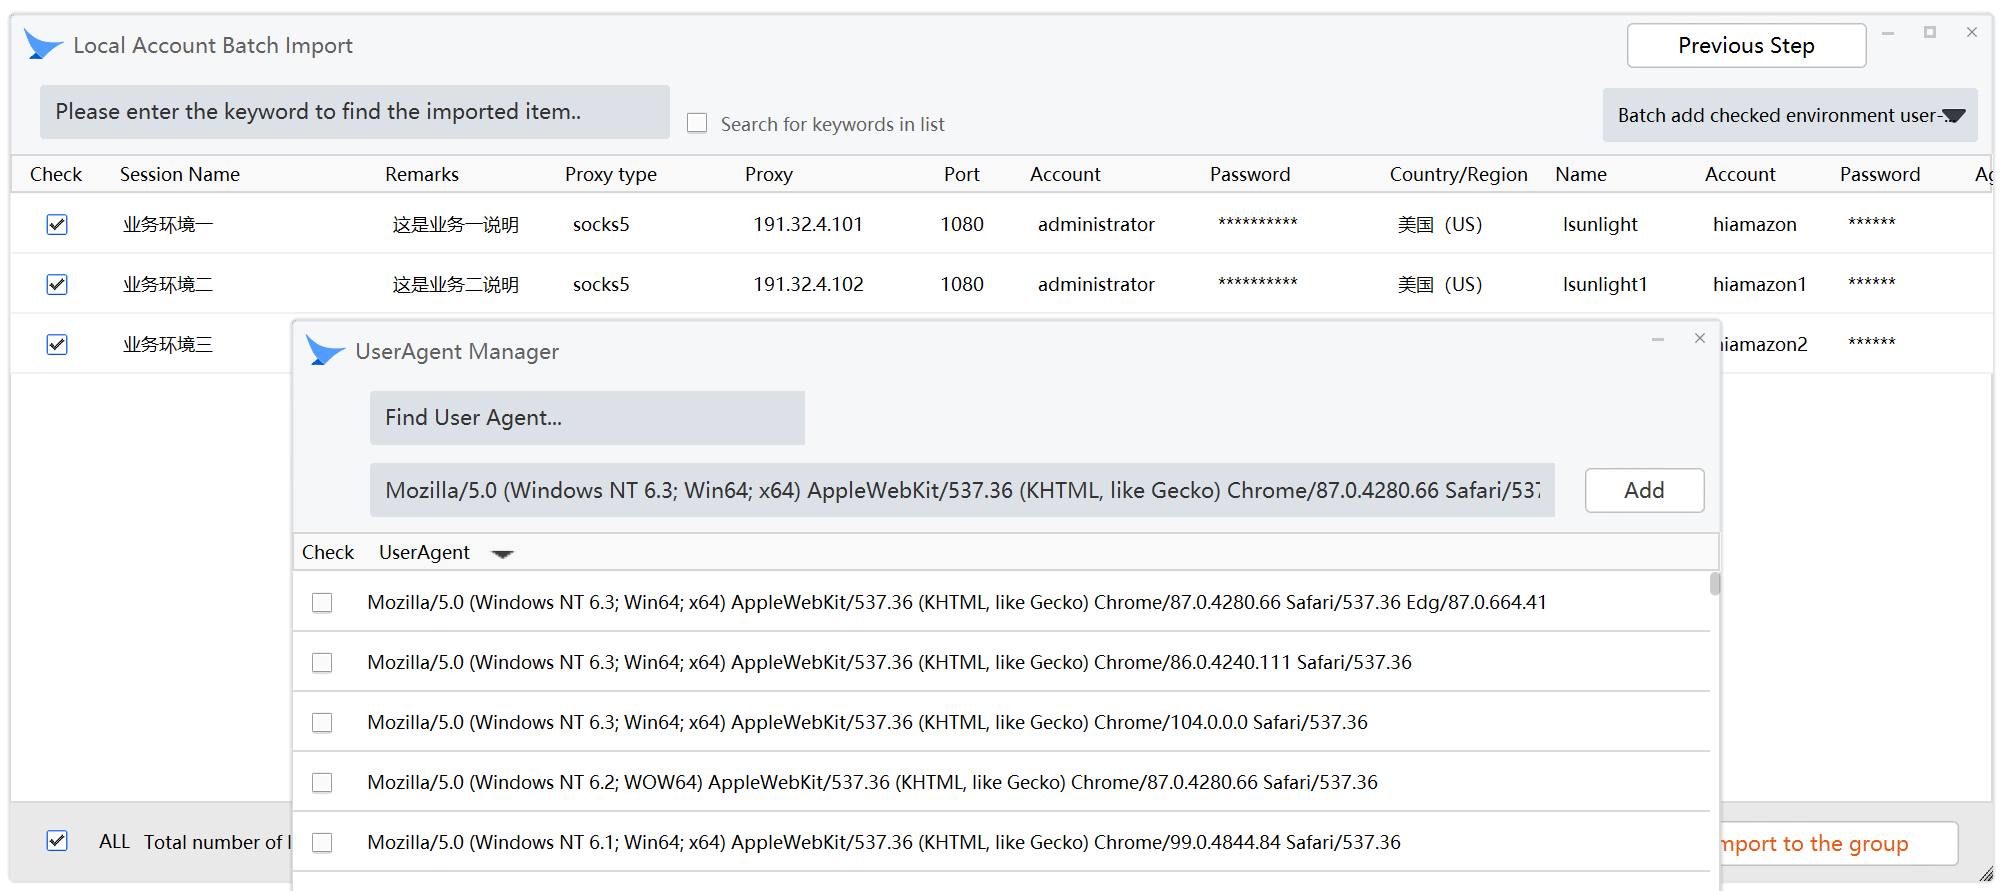
E. Replace UserAgent in batches. This function replaces USERAGENT values of selected items in batches. **When replacing the new value, first add a new UA to the list, or directly select a UA in the list, and tick, and then click the selection in the lower right corner, you can complete the replacement. **
Back to the current window:

If the values of the items to be imported do not need to be modified or have been modified.
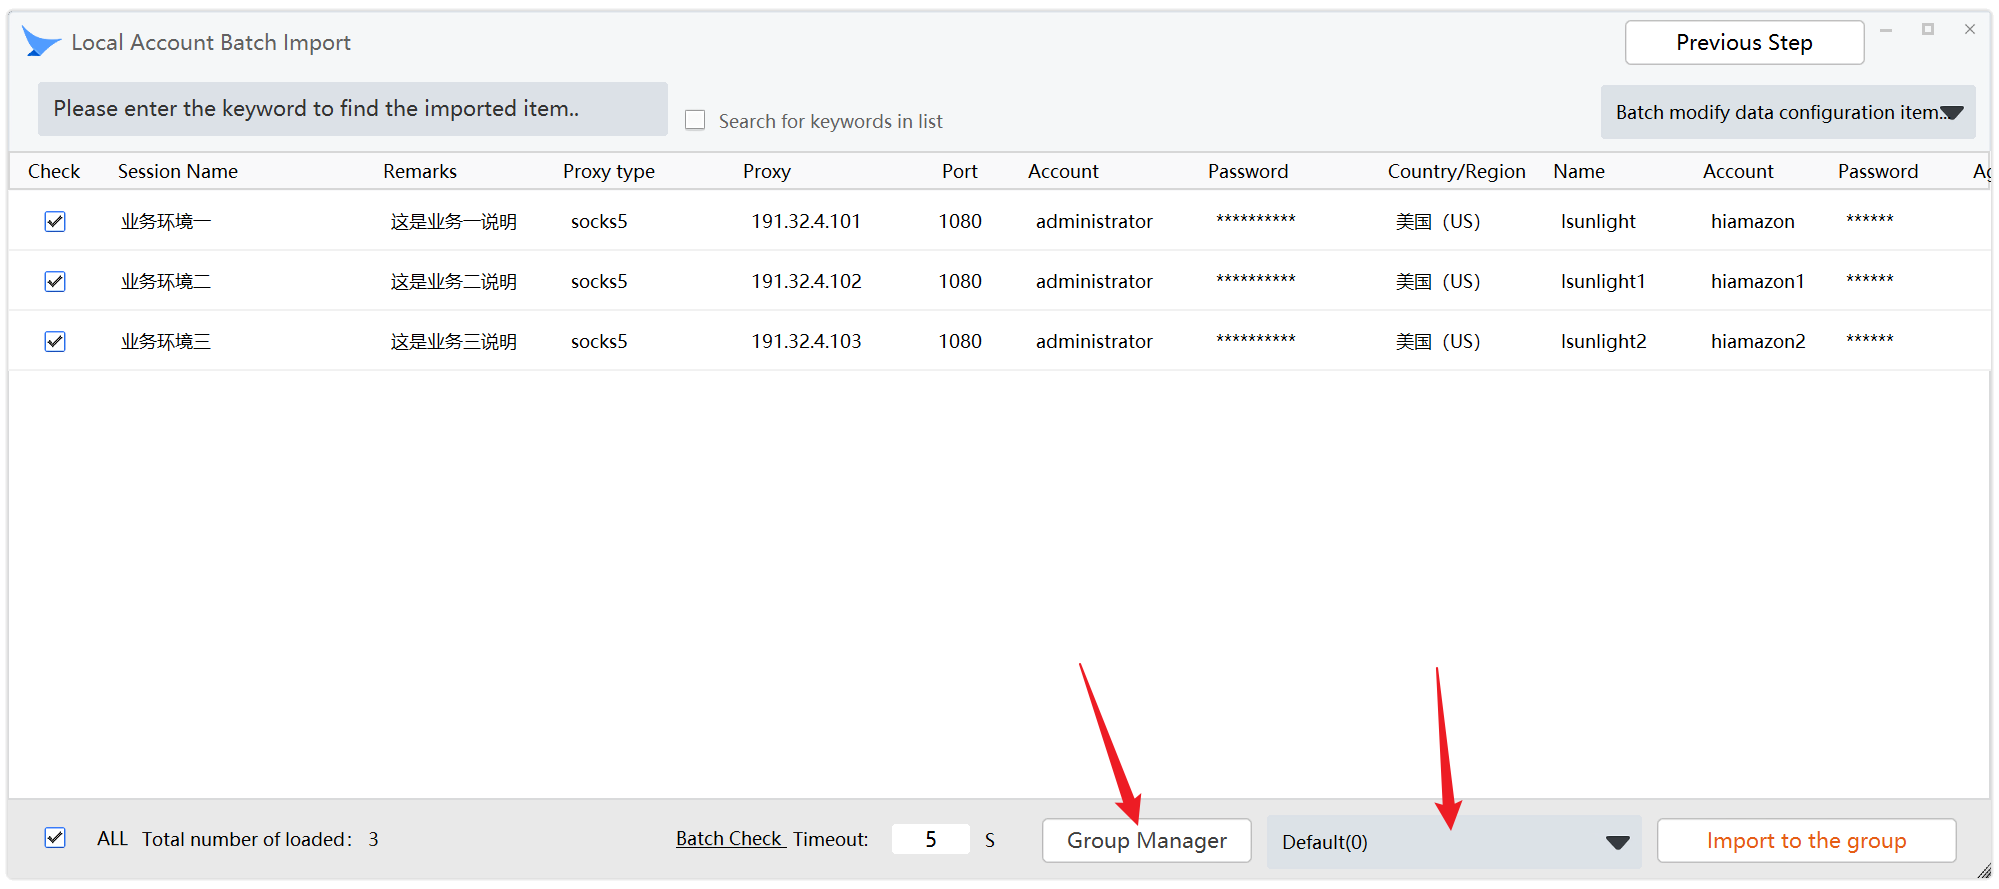
Start selecting the groups to import:
If you need to import an import into a new group, click: Group Manager
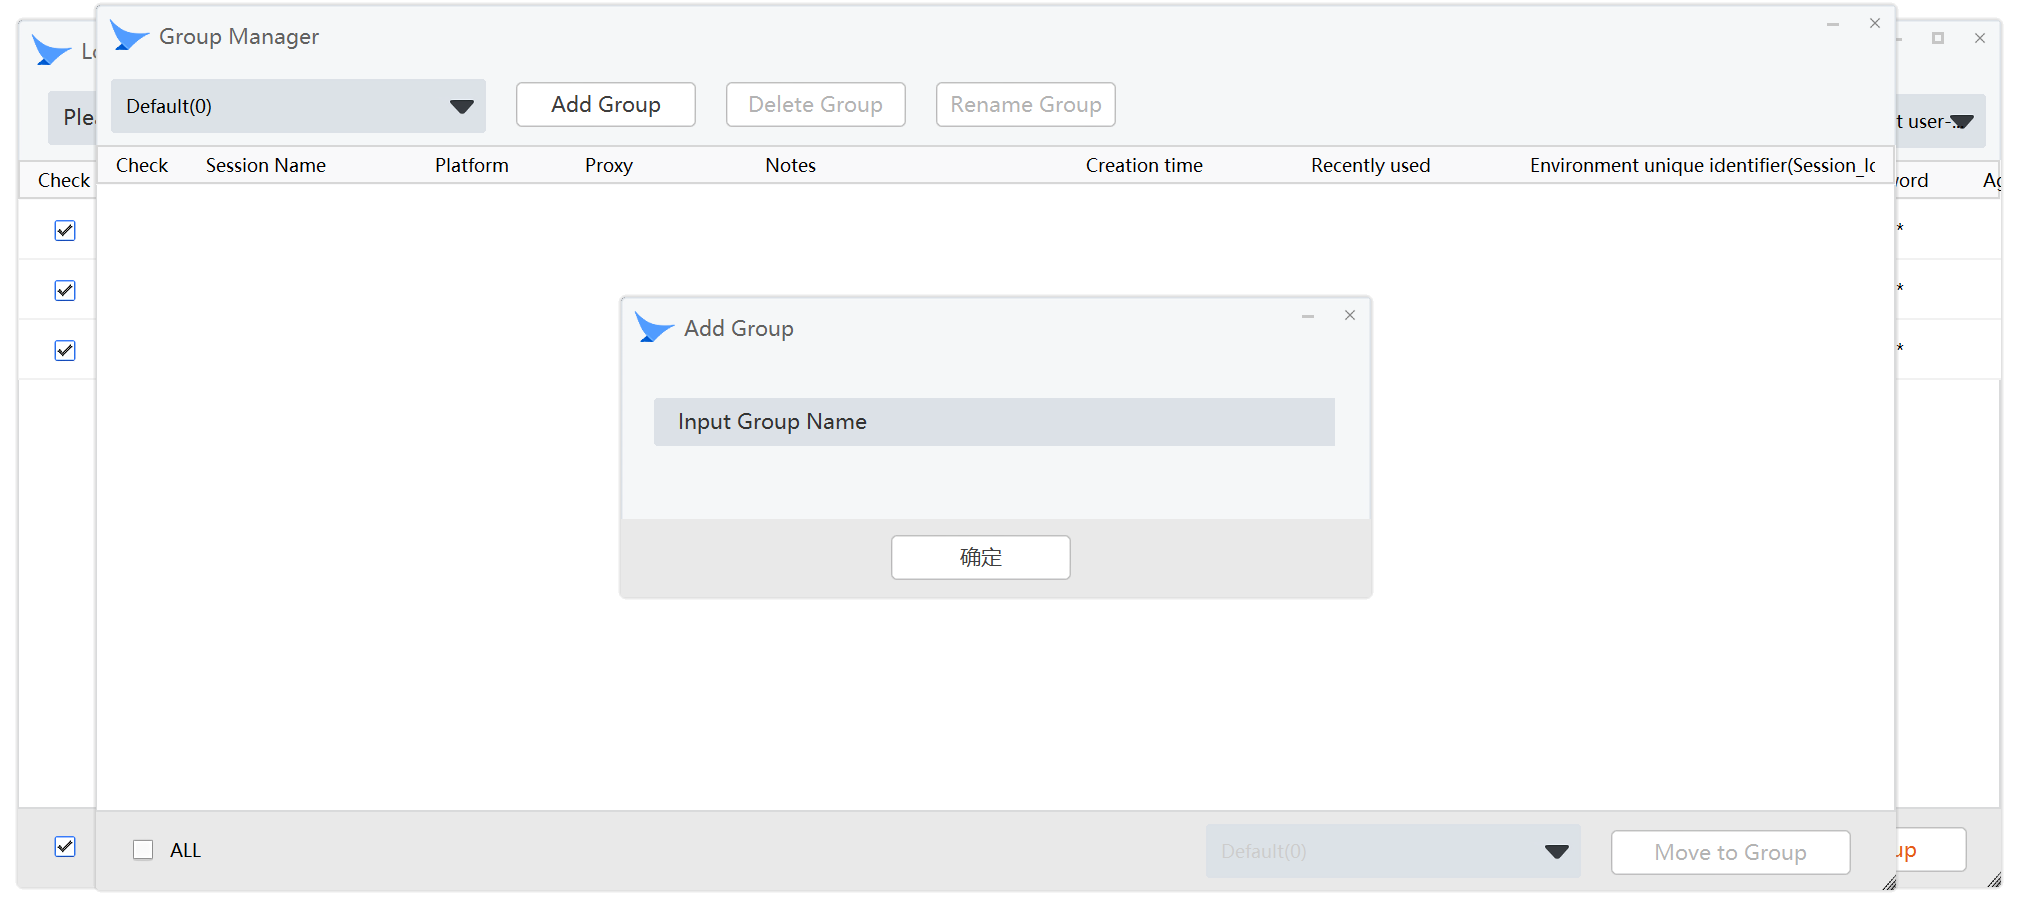
In the Group Manager that pops up, click Add Group and fill in the name of the new group. Here is a demonstration of creating a new group named New Group Once the new group is created, it can be seen in the dropdown in the upper left corner of the Group Manager.
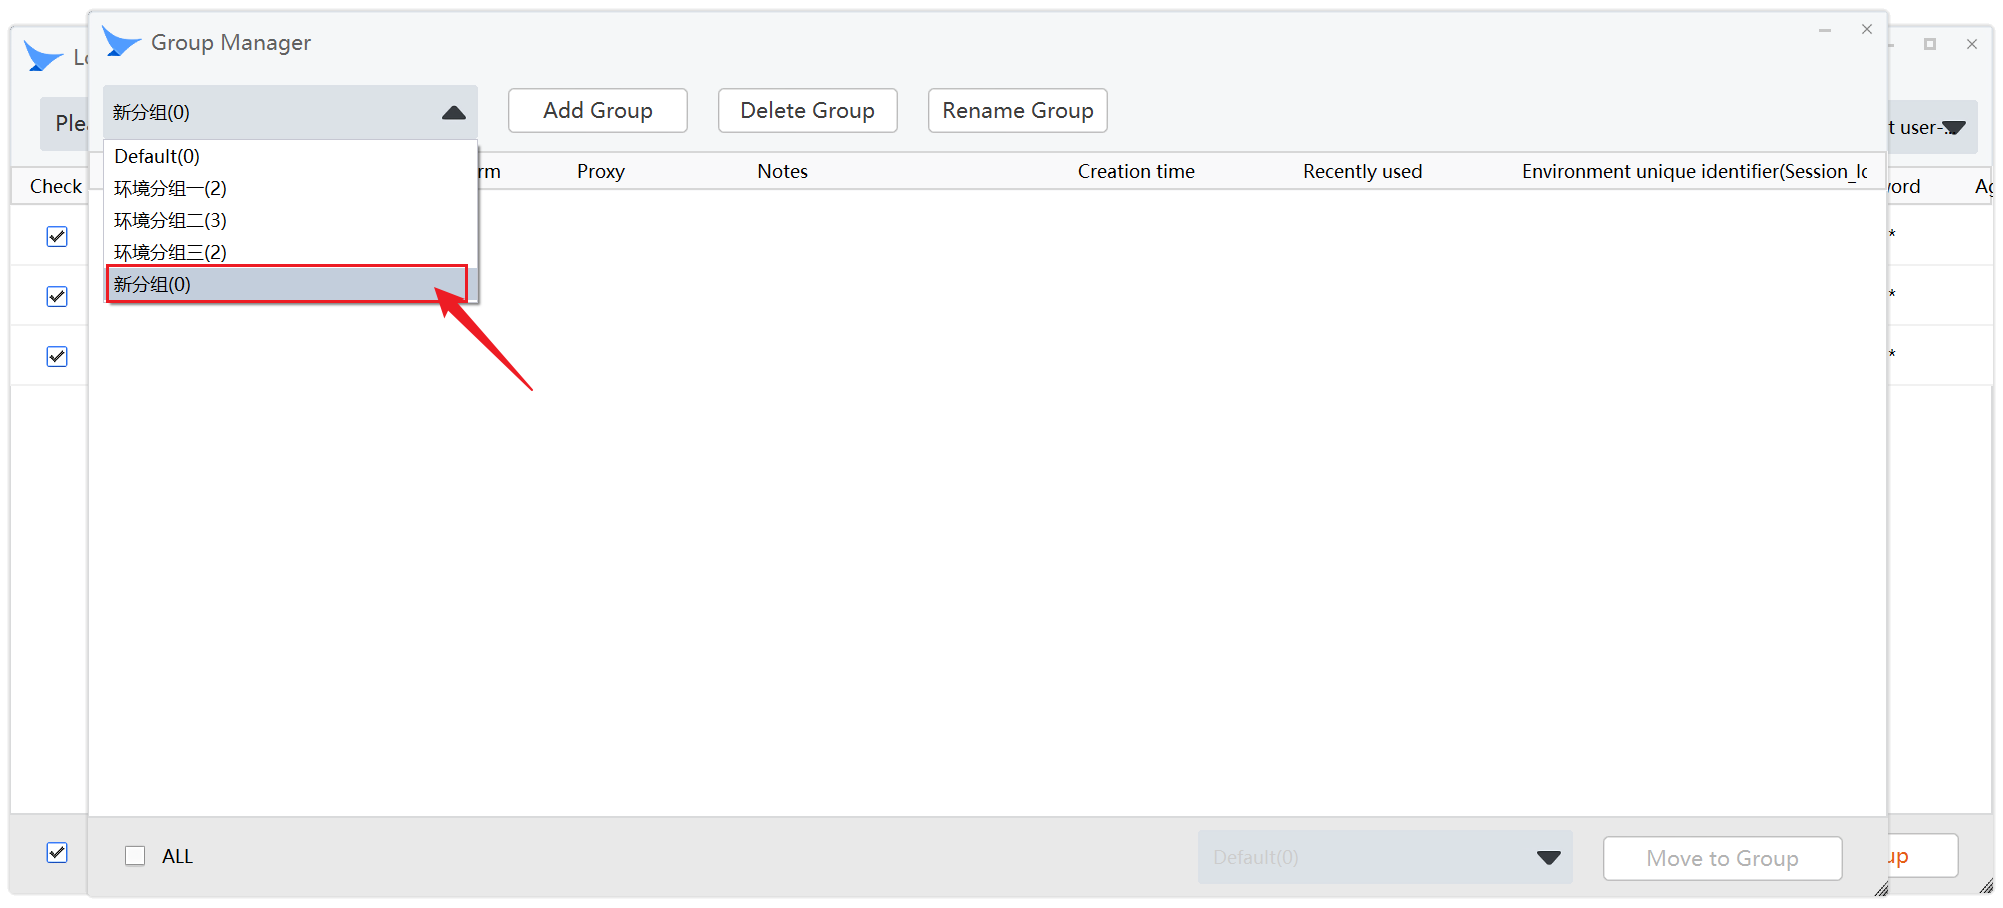
Then close the group Manager window and go back to the Local Account Batch Import window.
Group Select New Group Click the Check and Import to the group button You can see that all data has been imported successfully.
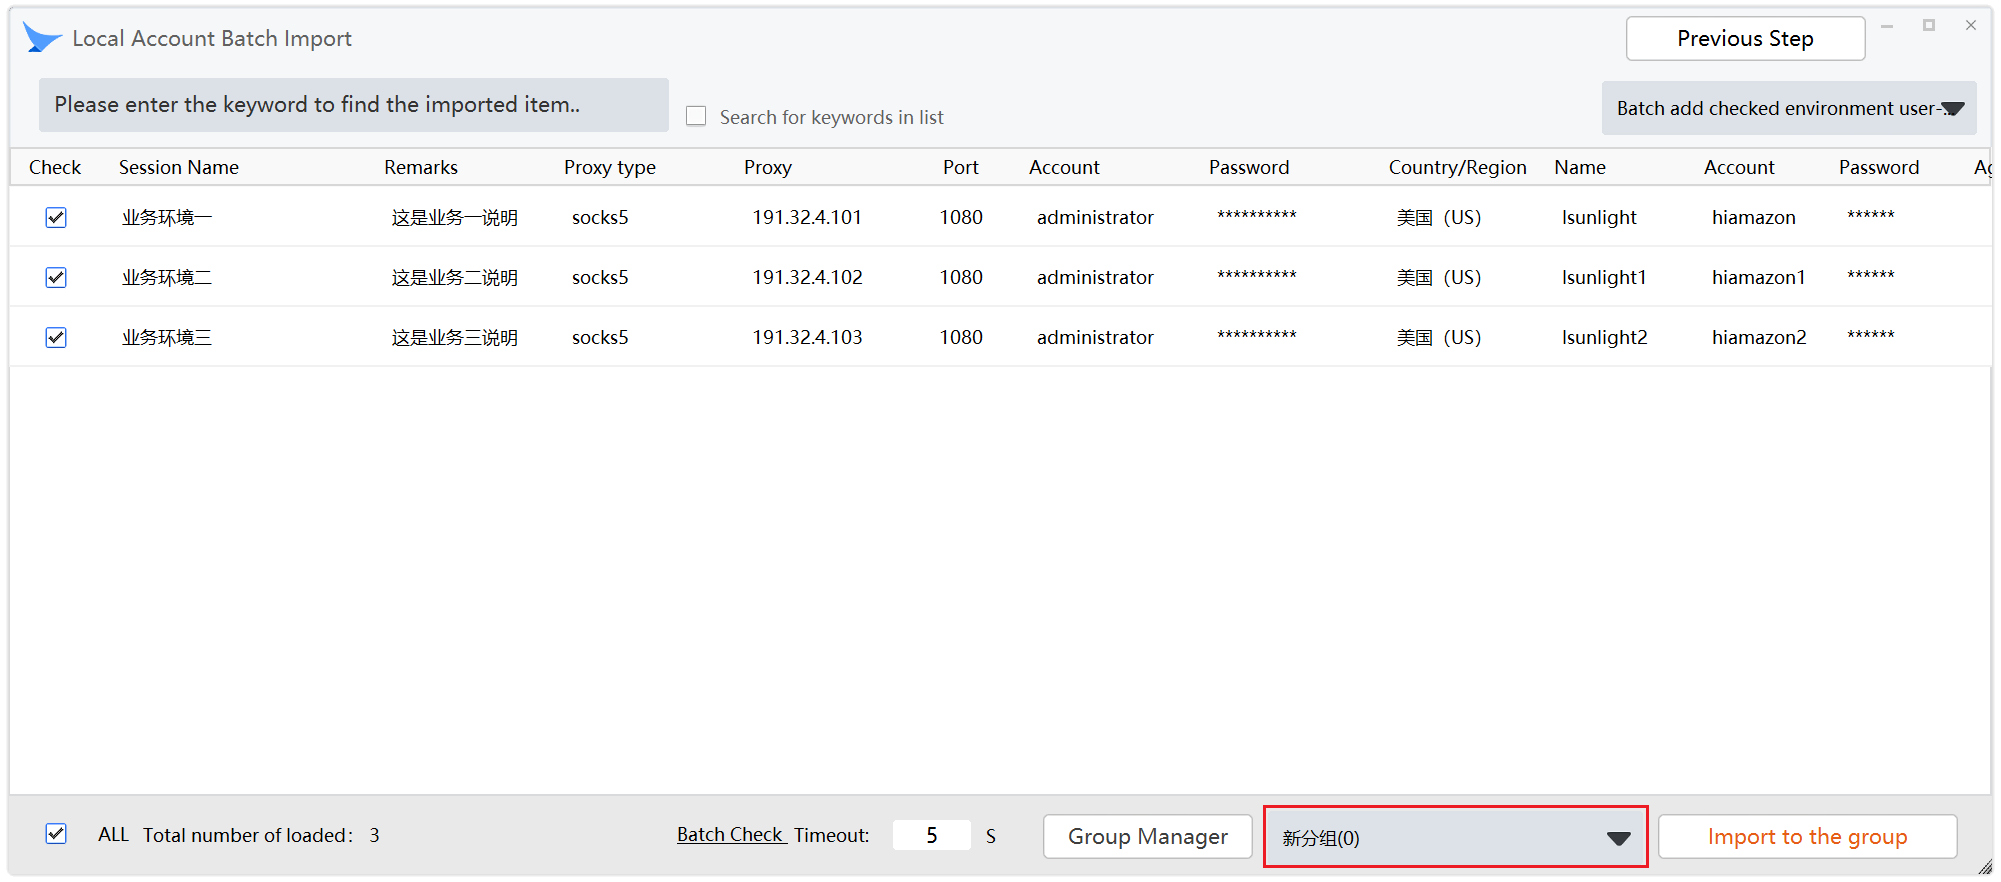
Note: If the existing environment name is the same as the environment name of the item to be imported, the item with the same environment name will fail to be imported. In this case, change the environment name of the item with the same name before importing the item.
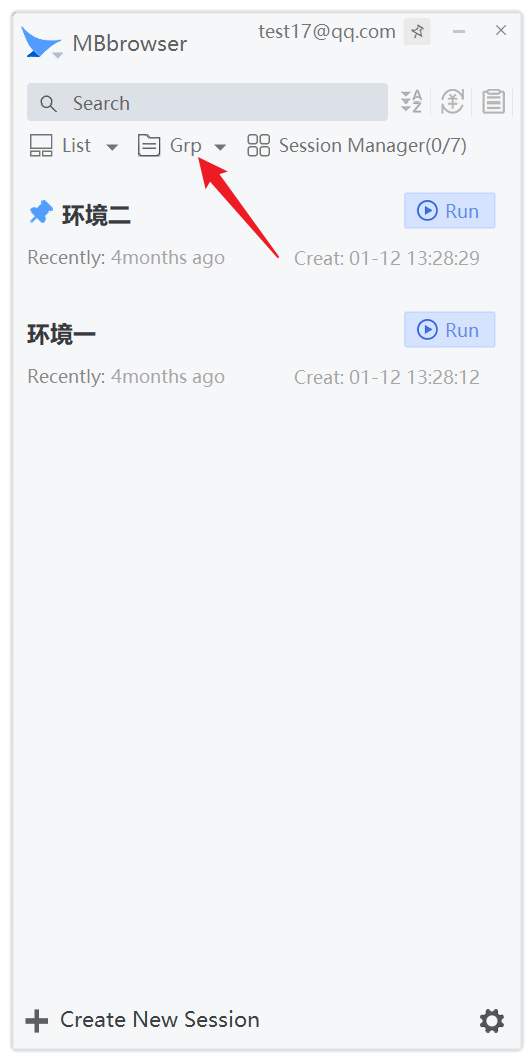
Click on Groups and select New Group **You can see as born: The ready-to-use business environment successfully imported from the formal business environment. **
