IPFlex configuration proxy IP
1、Open the home page of Mbbrowser and click "Download Mbbrowser";

2、Or enter“https://www.mbbrowser.com/download”Download page, click the download button to download;
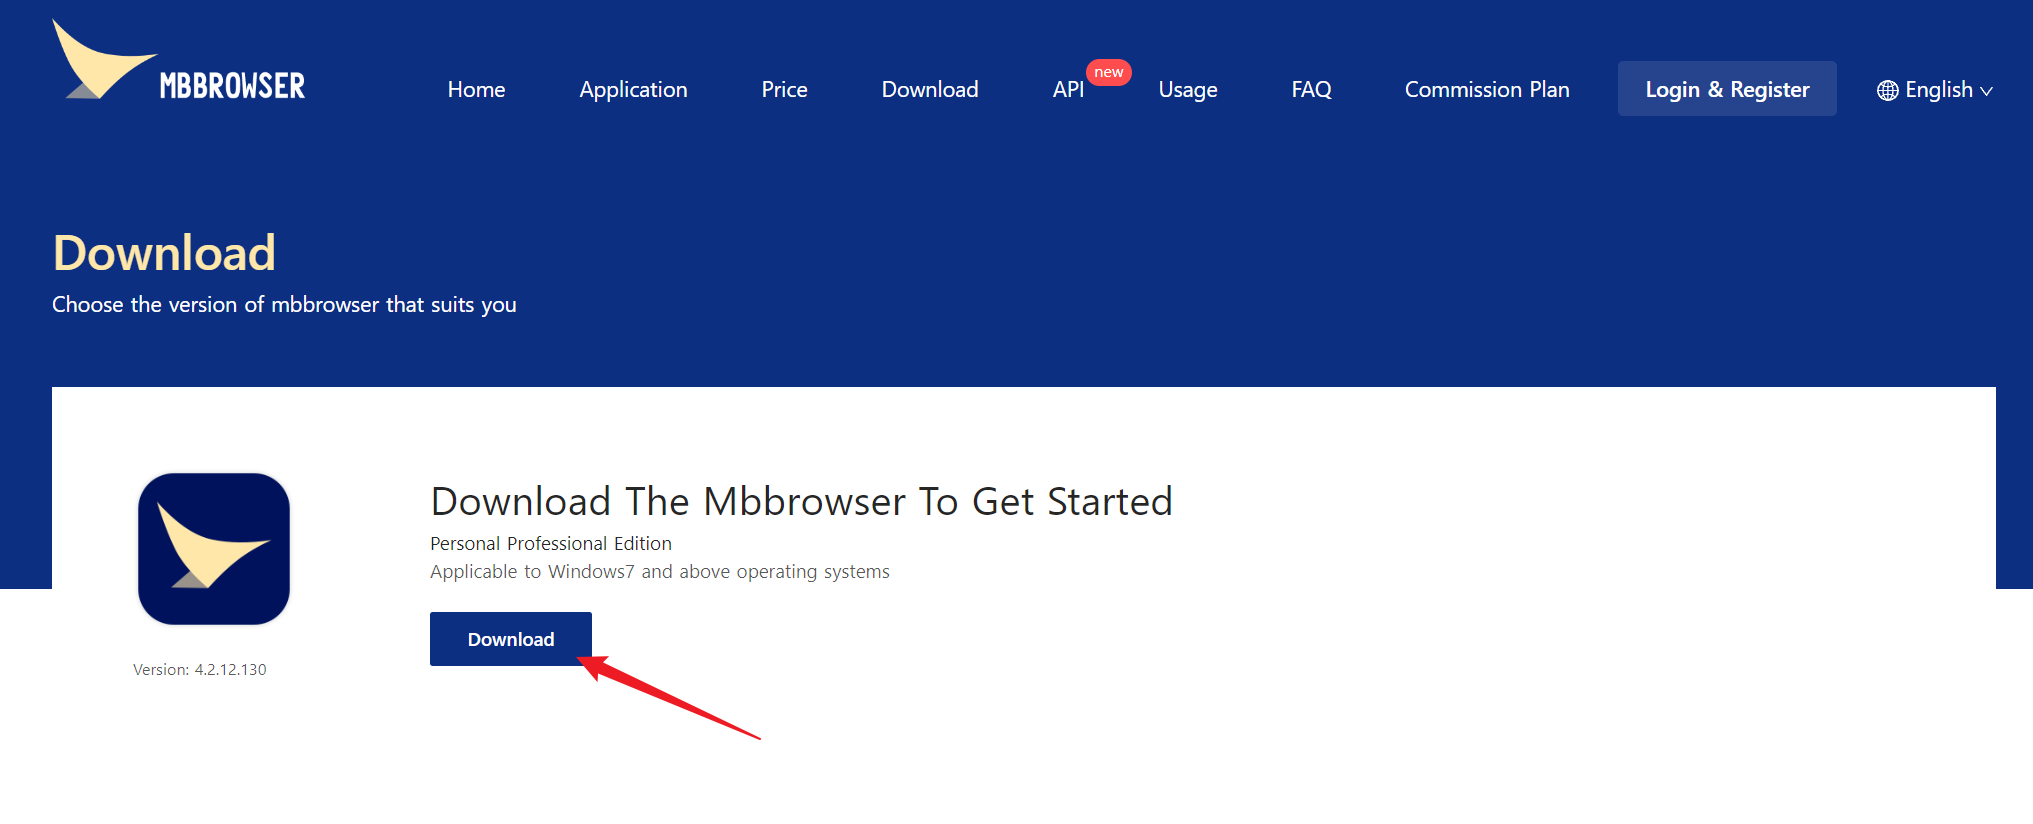
3、Download from the browser. The download progress is displayed at the bottom;

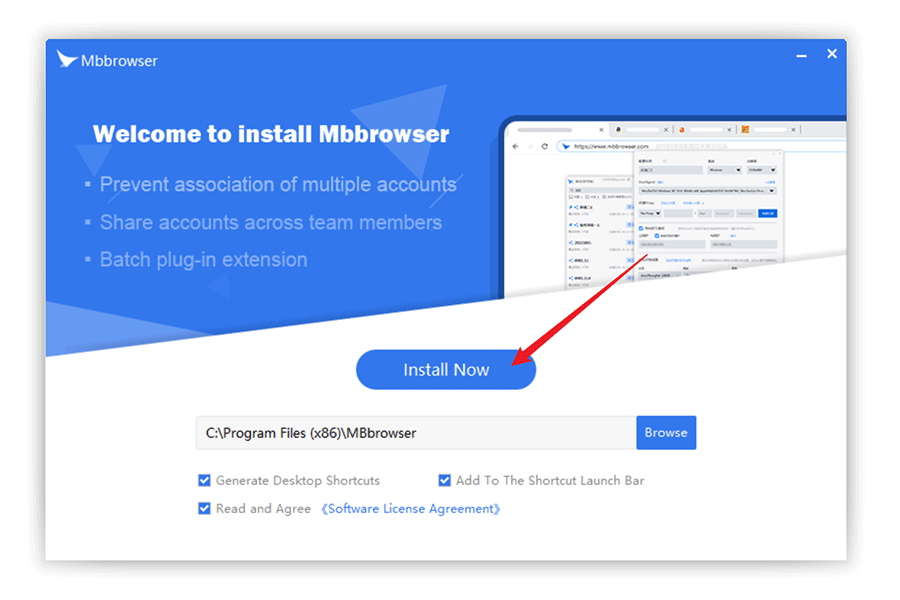
4、Find the downloaded installation file, double-click to install;

5、Double-click and click the button;
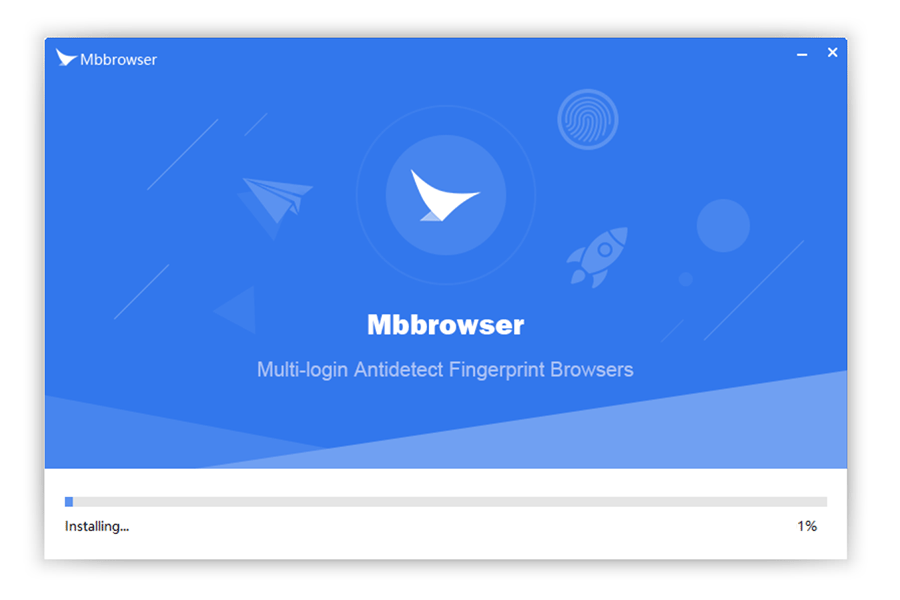
6、Wait for the installation progress, which takes about 30 seconds;
7、Click Install finish.
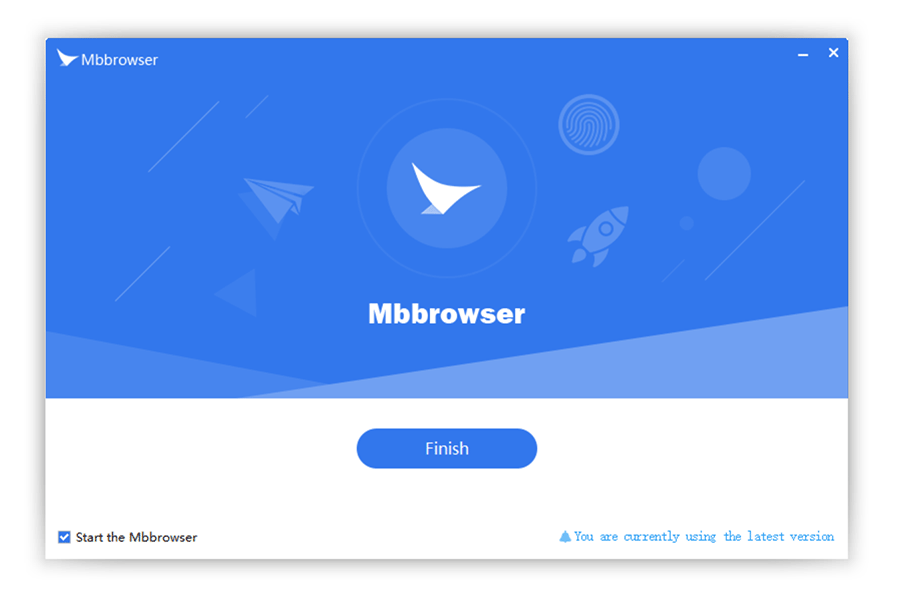
Note: Software such as 360 May encounter false positives when you install it for the first time. You can add the software to the whitelist of 360 or close security software such as 360.
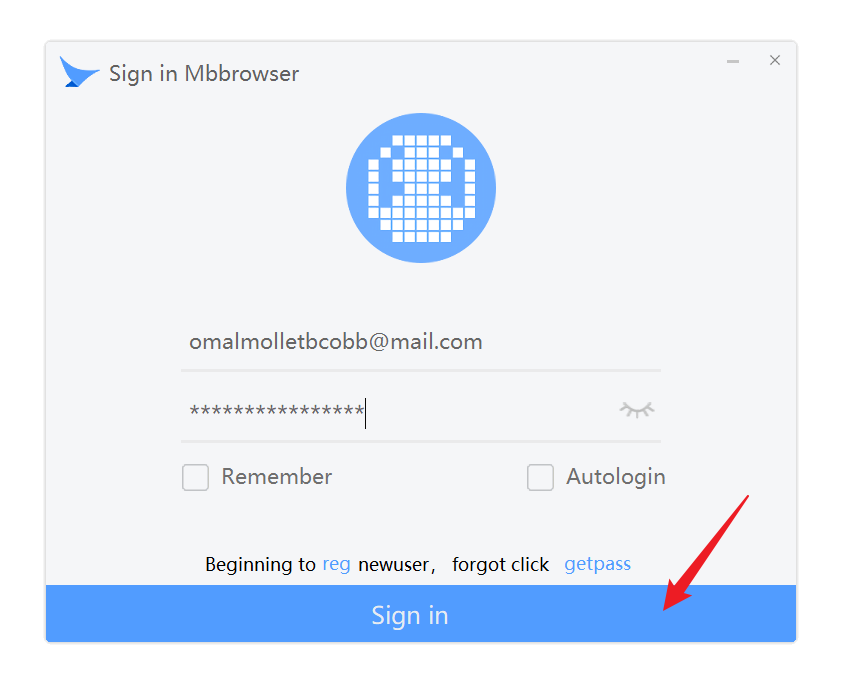
8、After installation, double-click the "Bird Browser" icon on the desktop to open it;
9、Enter your registered account name and password information in the pop-up login box, and click login;
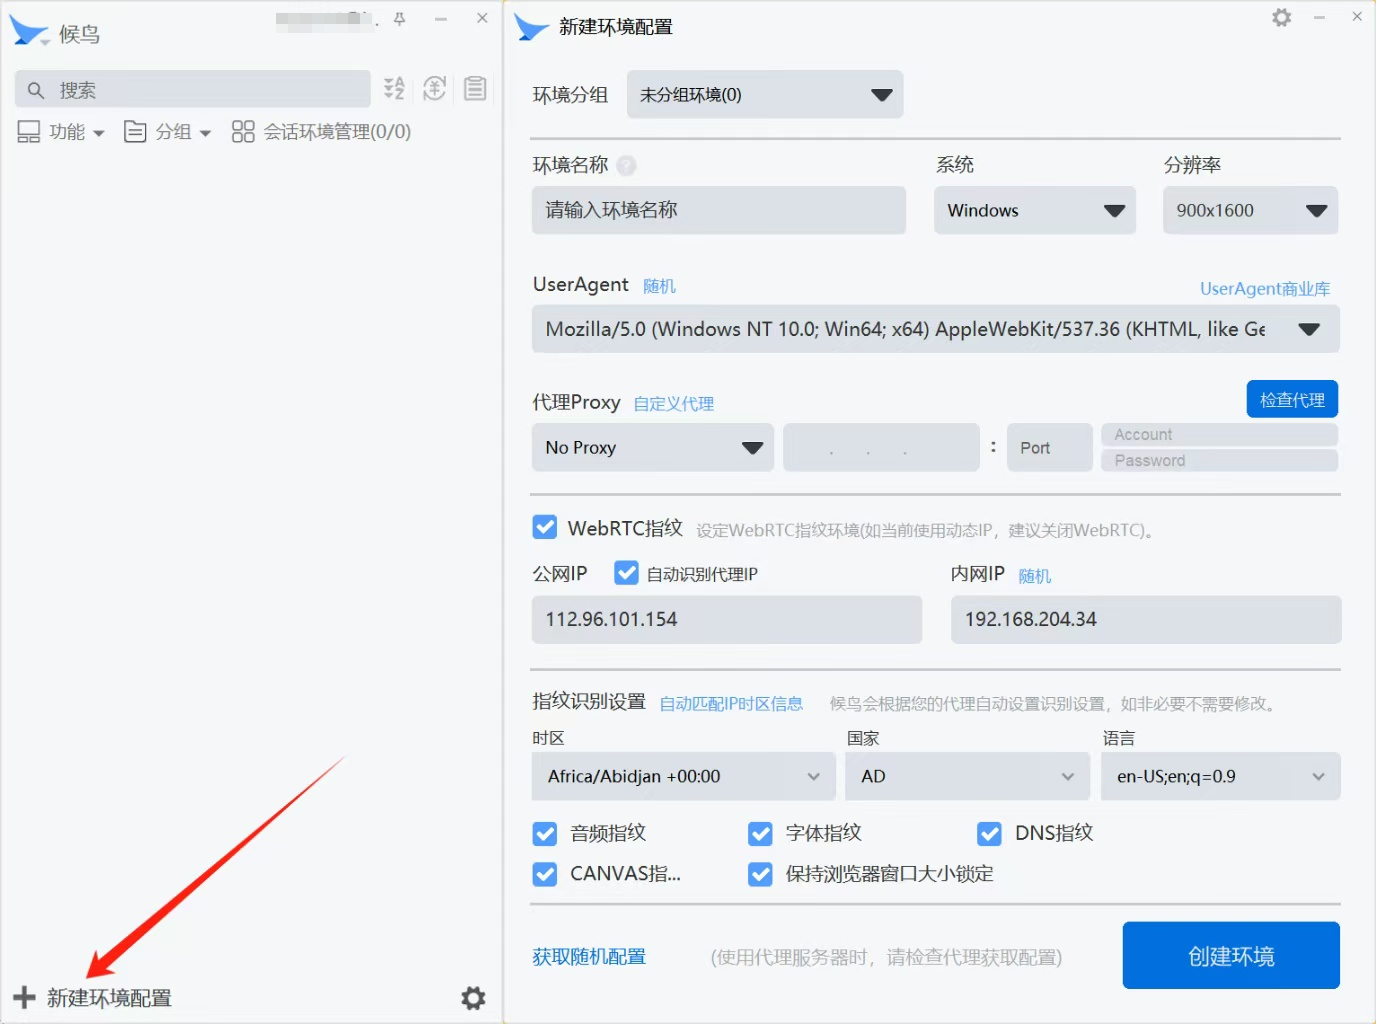
10、After logging in, the main interface of the migratory bird browser pops up, click on "New Environment Configuration" below;
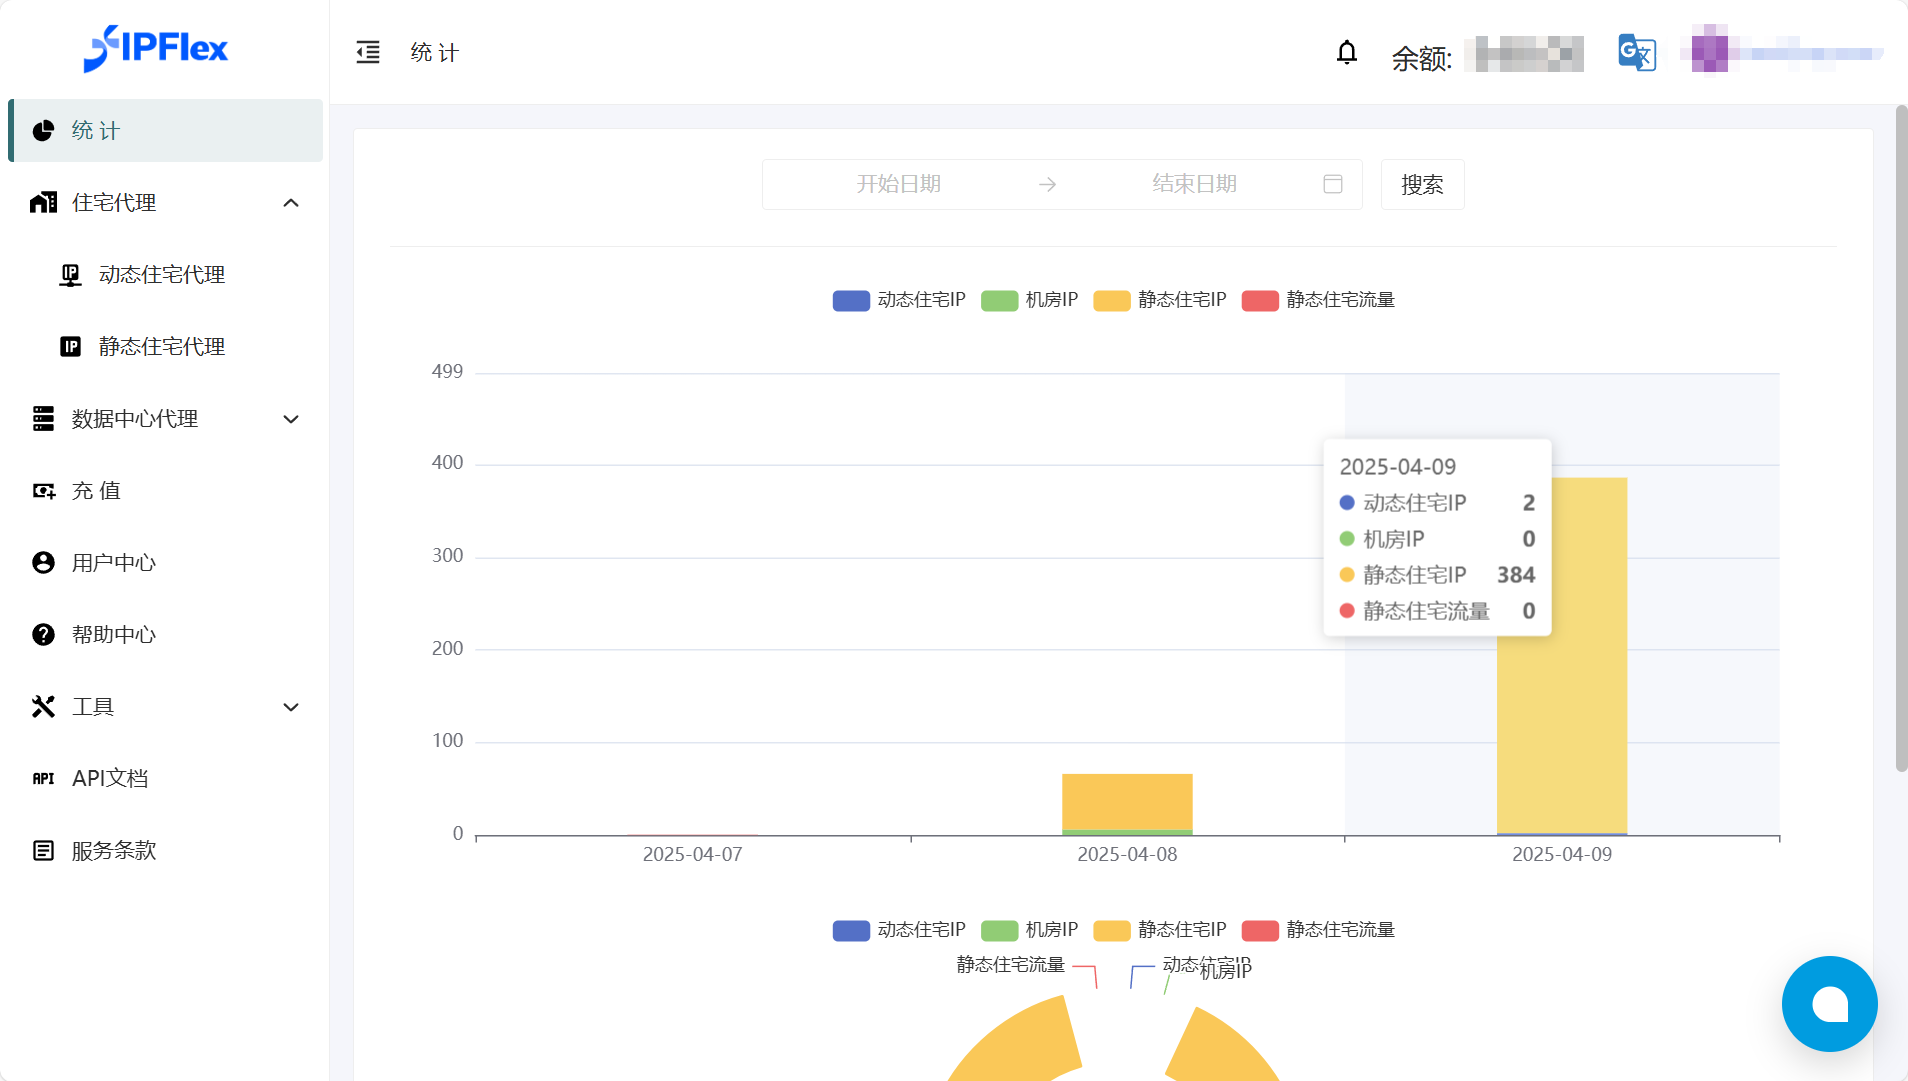
11、Register and log in to IPFlex, and log in to the user interface.
12、Click on the recharge interface, select the recharge amount and make the payment.

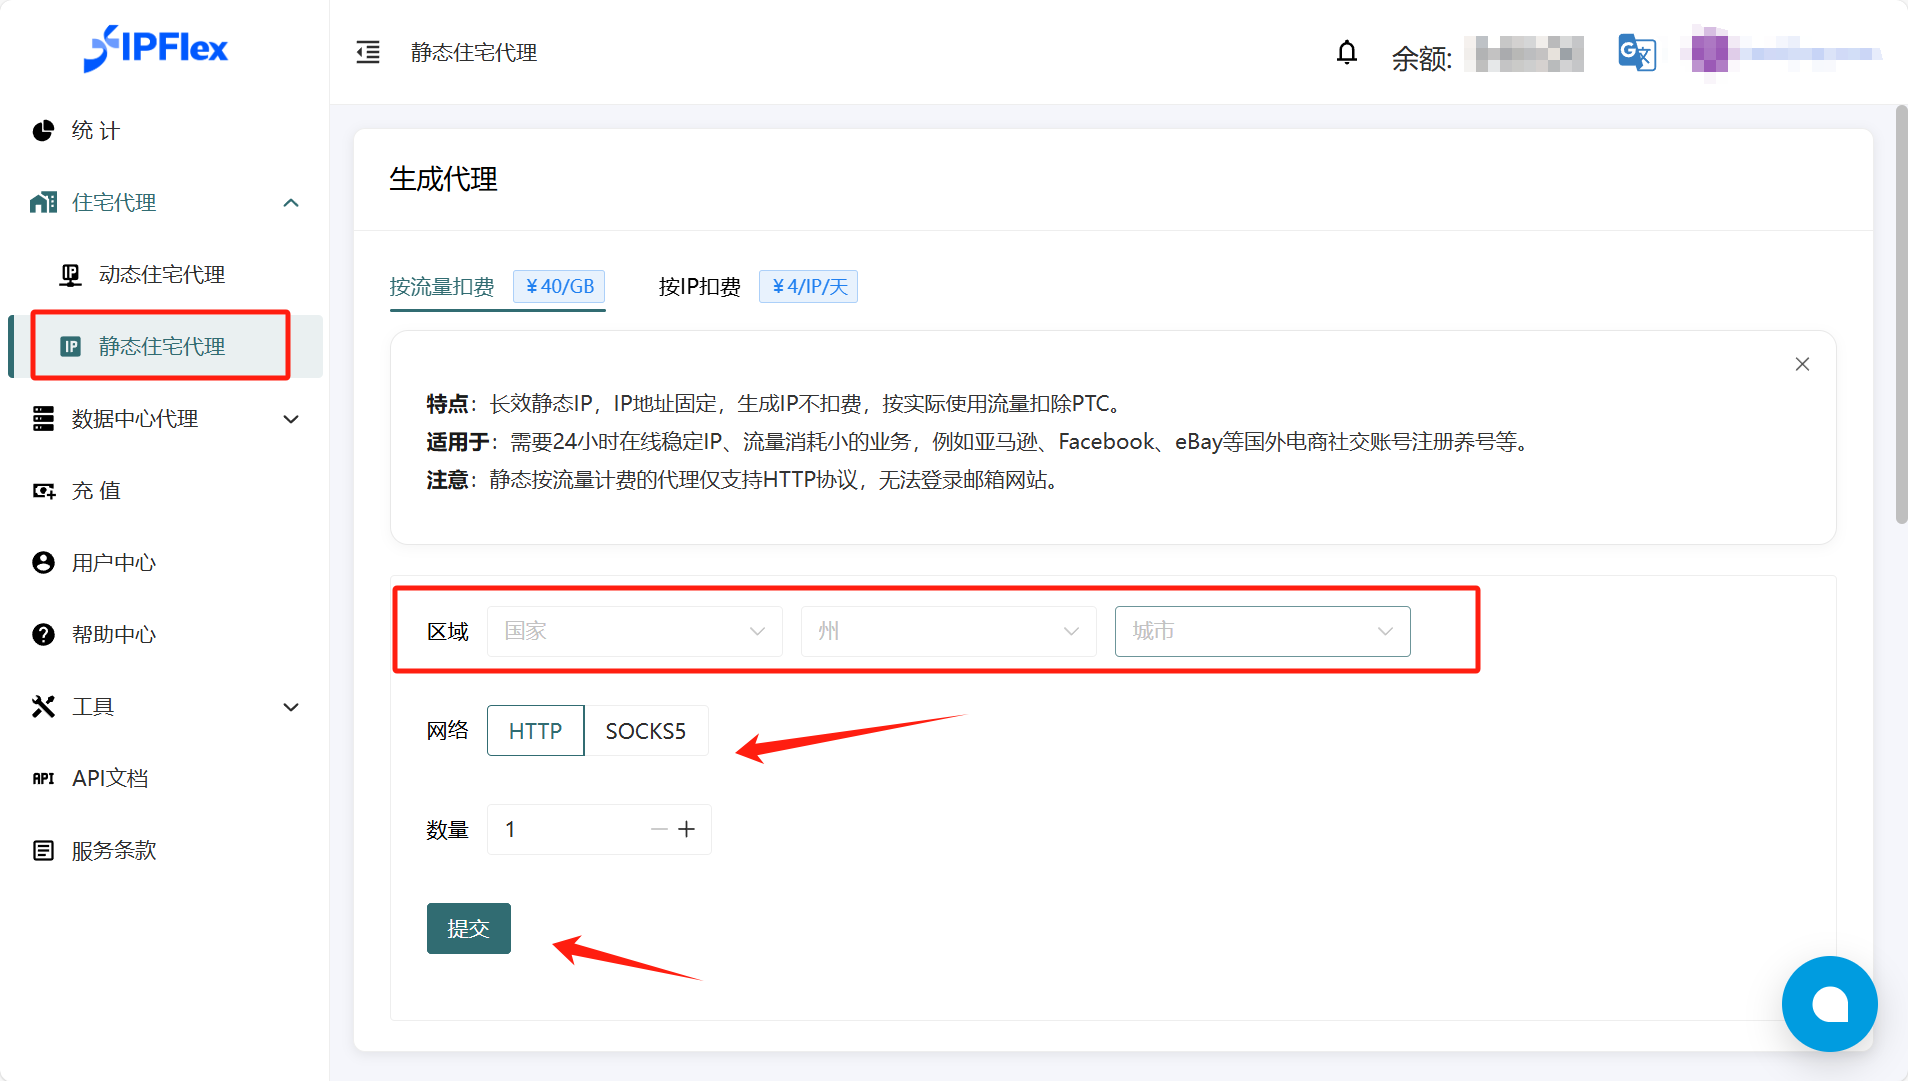
13、Browse the navigation bar and select the desired type of proxy service (residential proxy, data center proxy).

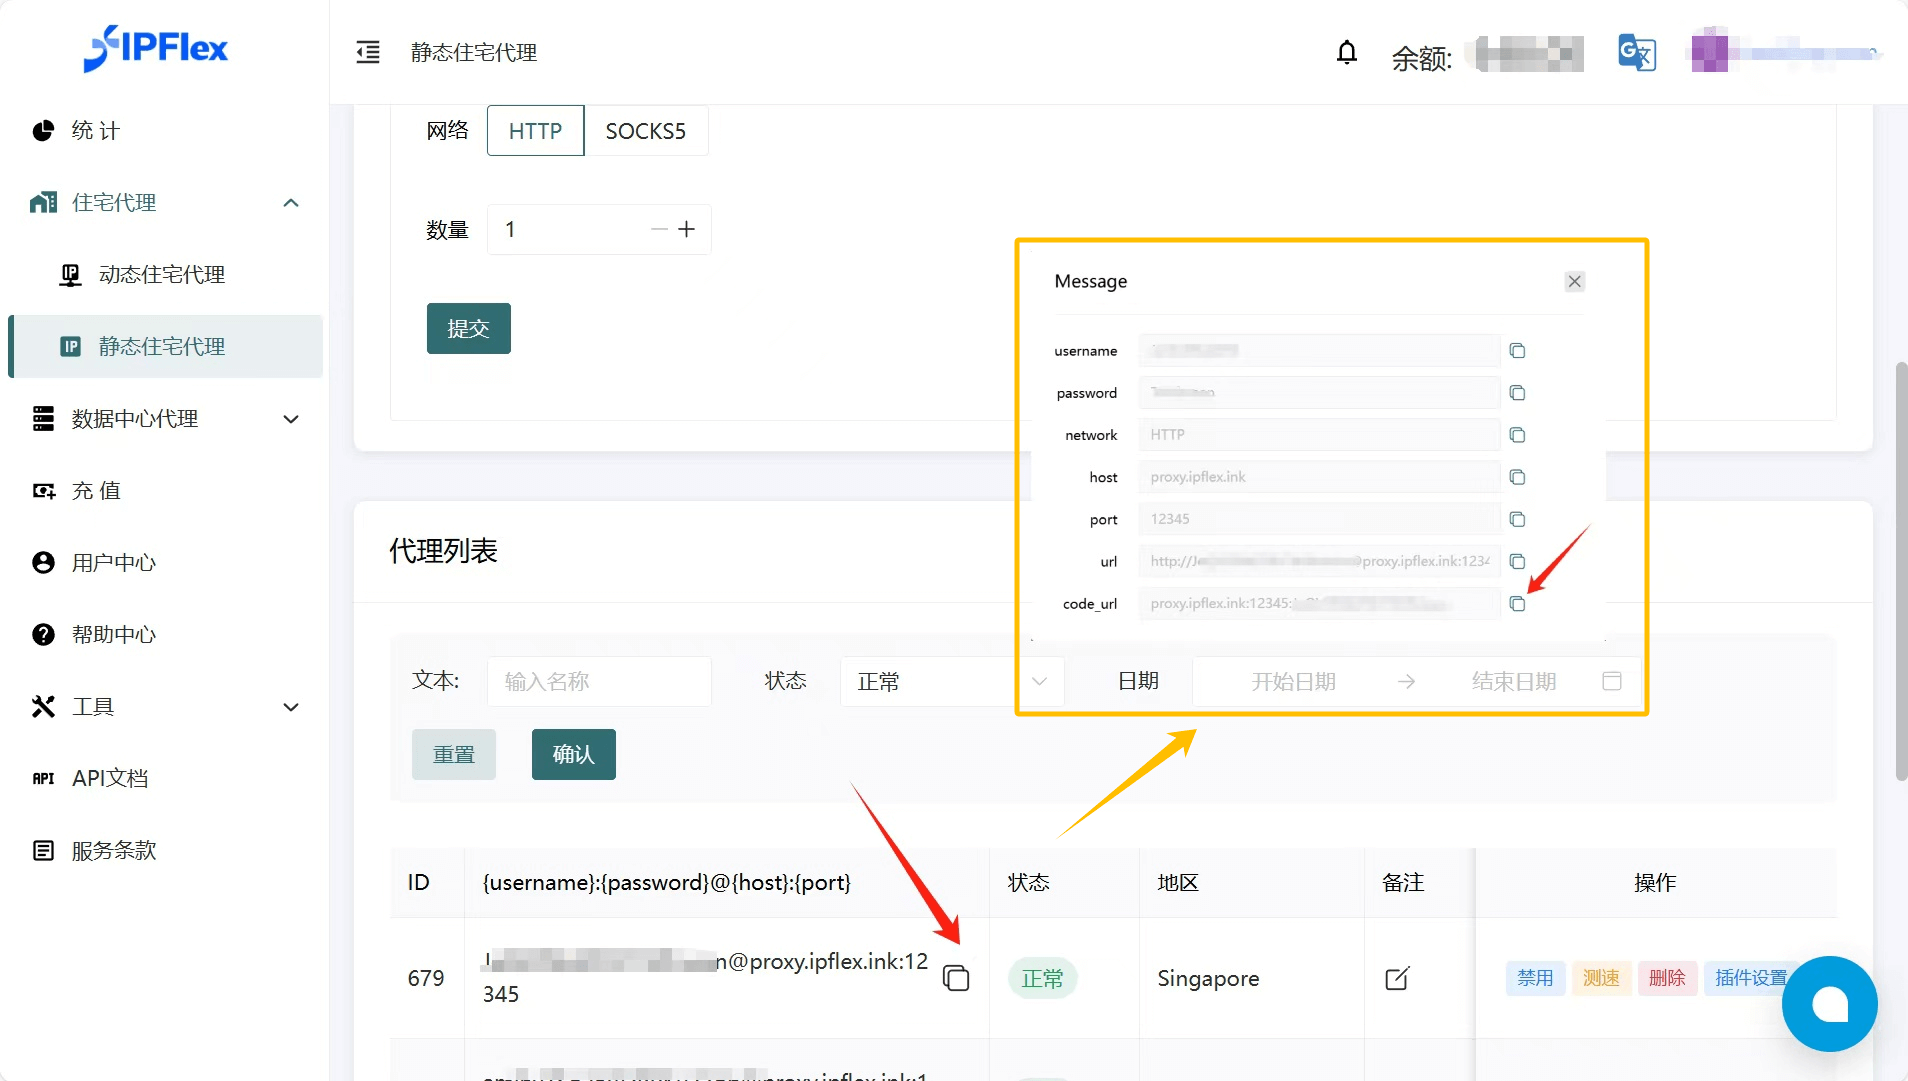
14、Taking static residential agents as an example, you can choose the charging method according to your needs (charging by traffic or IP), select the IP region (country state city), network protocol (HTTP/SOCKS5), and number of IPs according to your needs, and click submit.
15、The generated proxy ID (username:) can be viewed in the proxy list password@host : port`)。
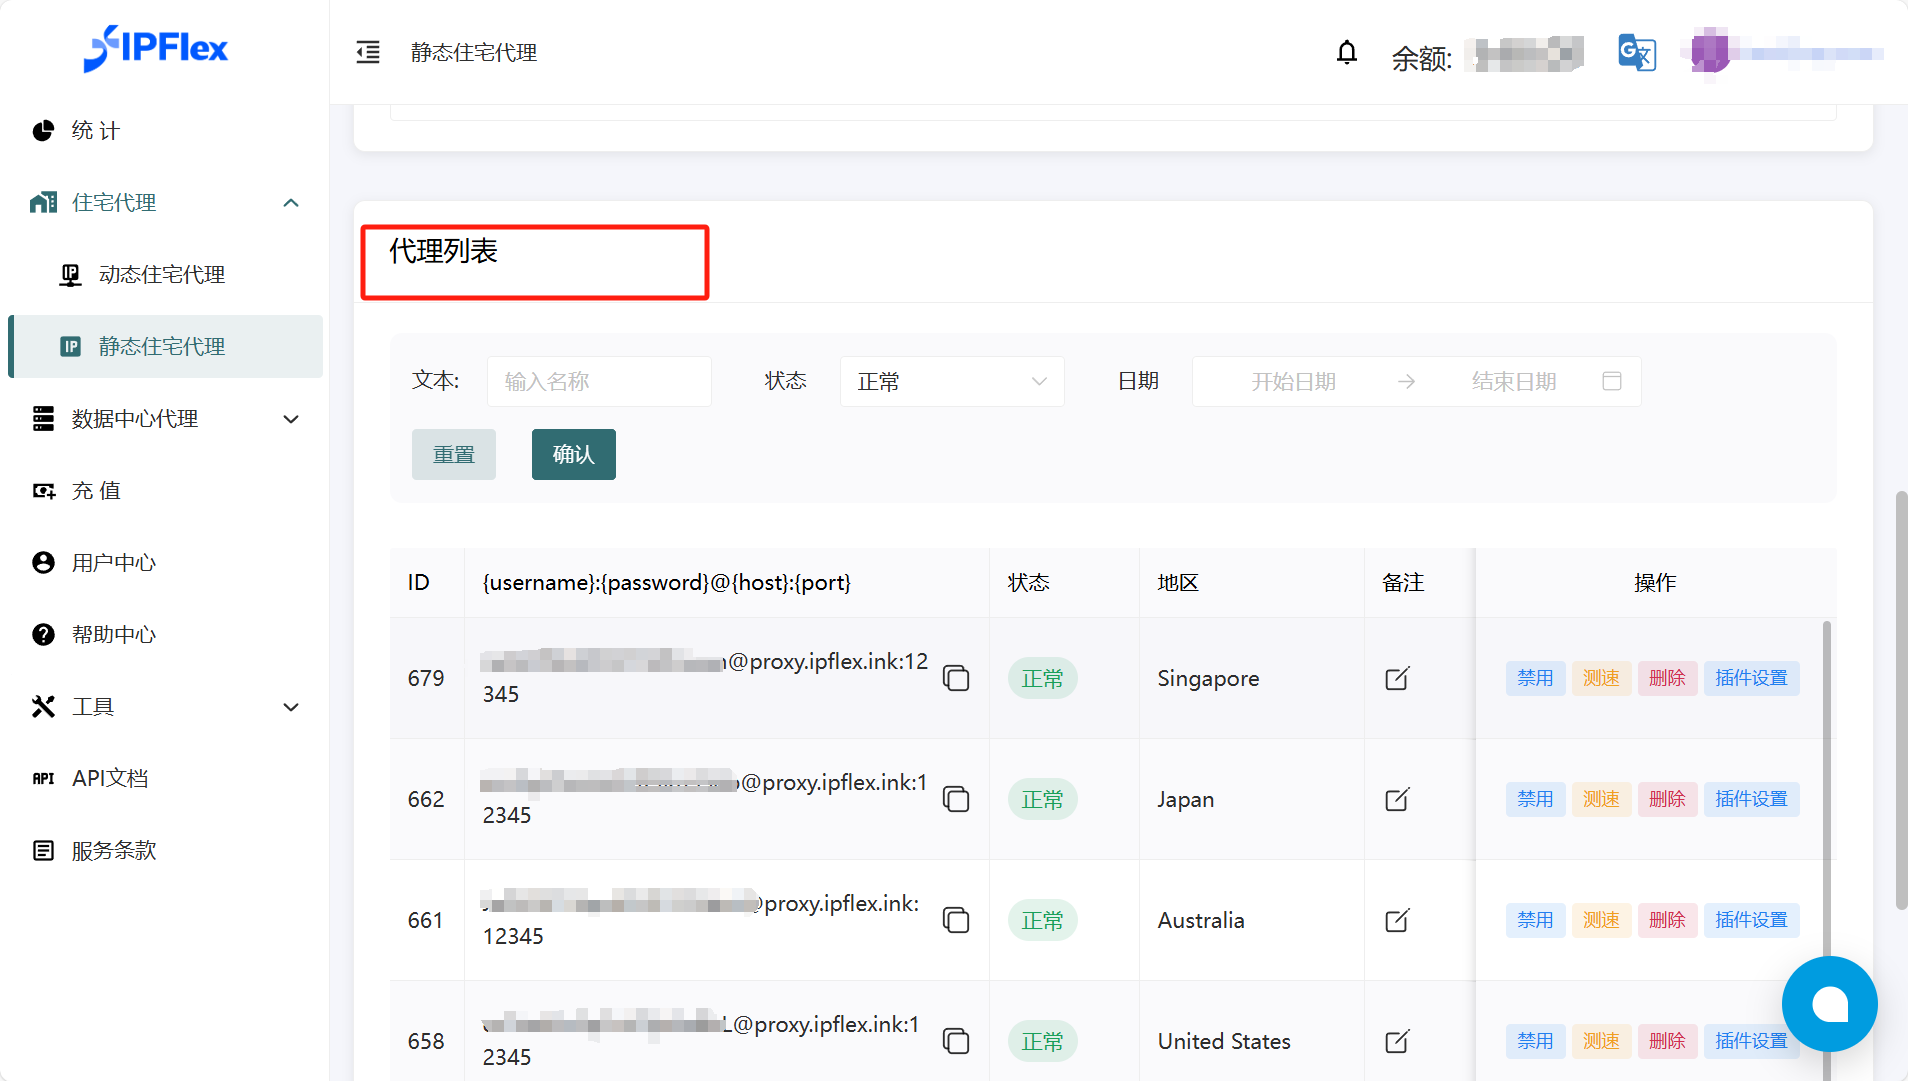
16、Click to copy the generated IP.
17、Paste the copied IP into the configuration interface of the Bird Browser and select the corresponding proxy protocol.