Custom Plugin Import To Mbbrowser
Video Tutorial
| Import a custom plug-in | Install custom plug-in to specified environment through API |
|---|---|
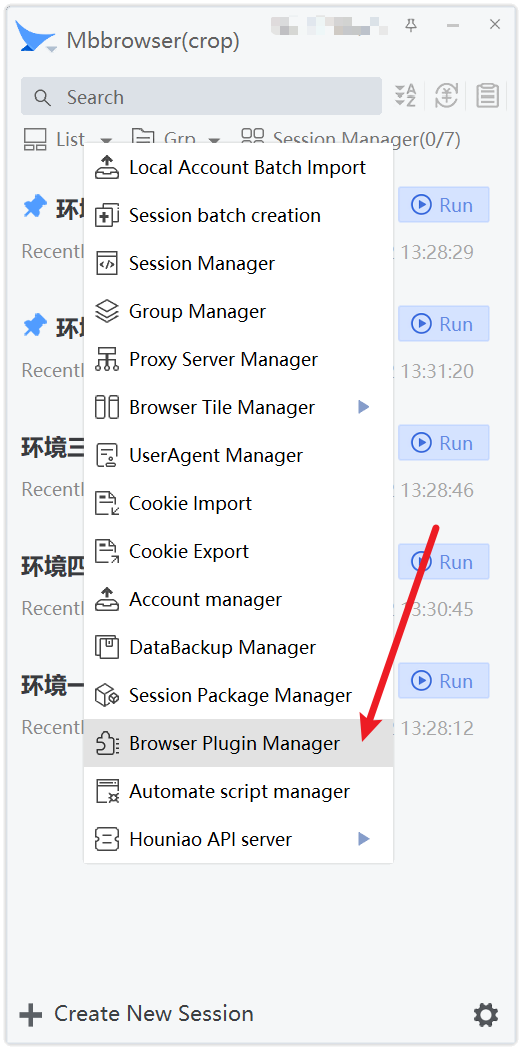
1. On the main panel of Mbbrowser, click Settings -> Browser Plugin Manager to enter the plugin management interface.
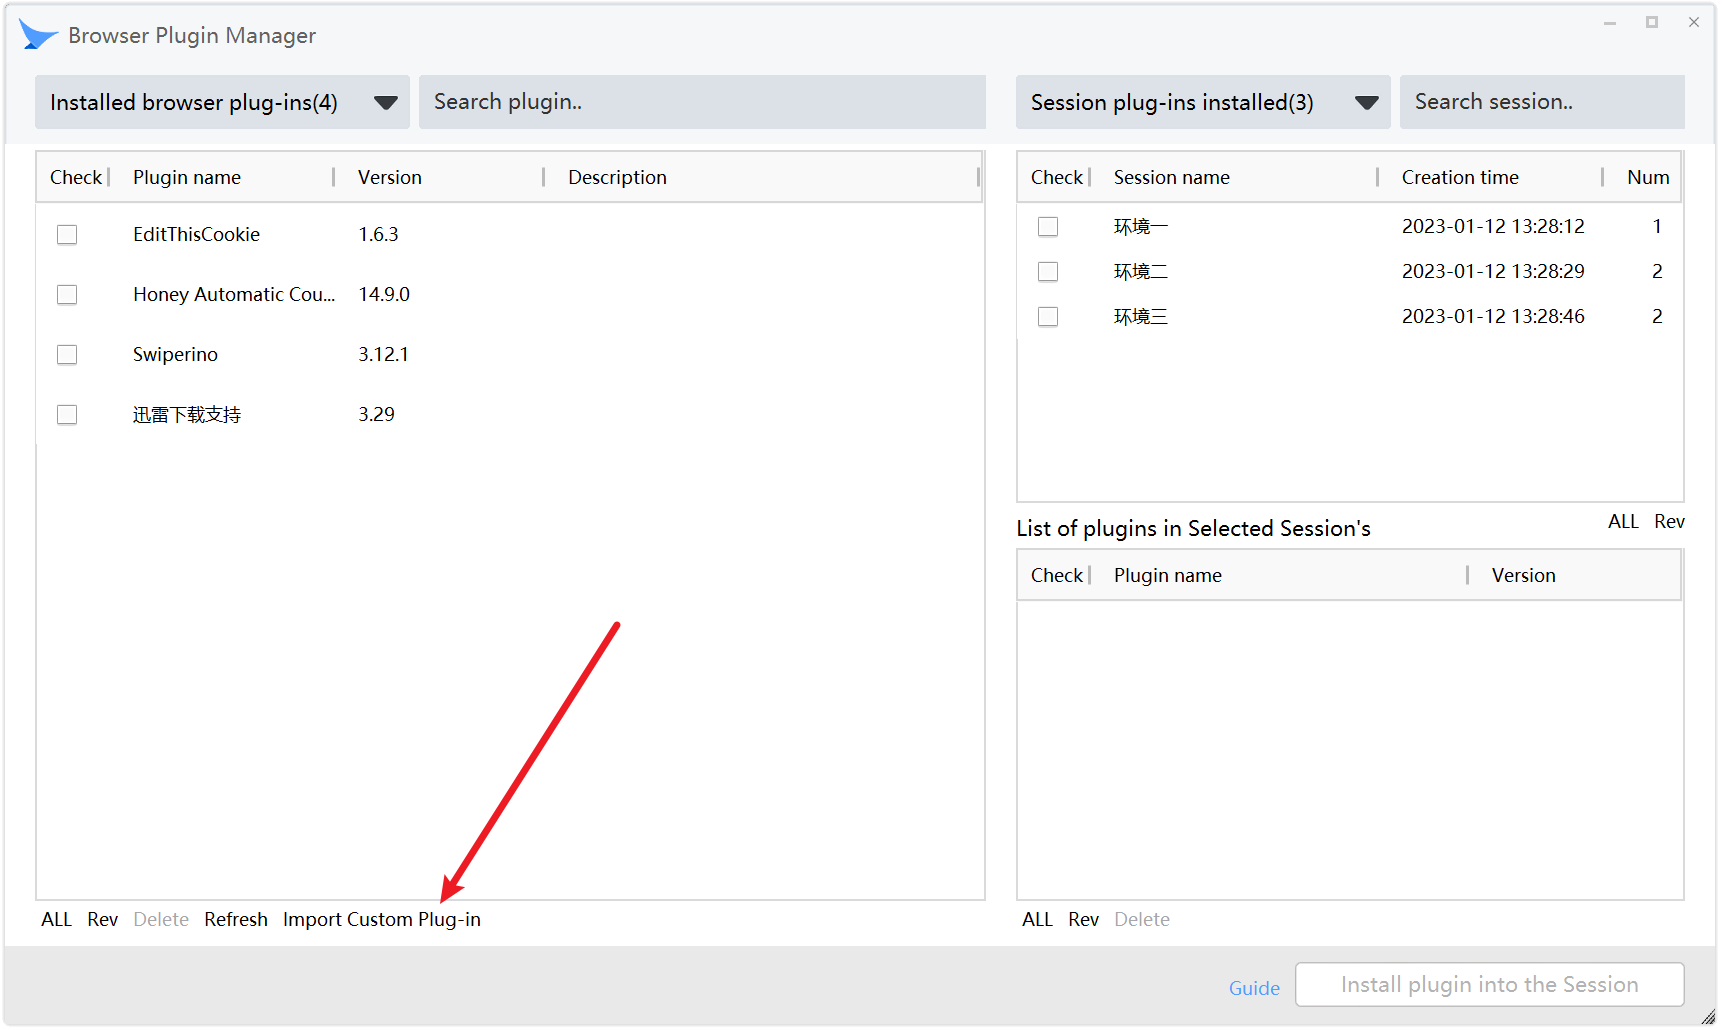
2. After making sure that there is no plug-in to import in my custom plug-in list, please click the Import Custom Plug-in button.
3. You can see the pop-up window: Import custom plug-in.
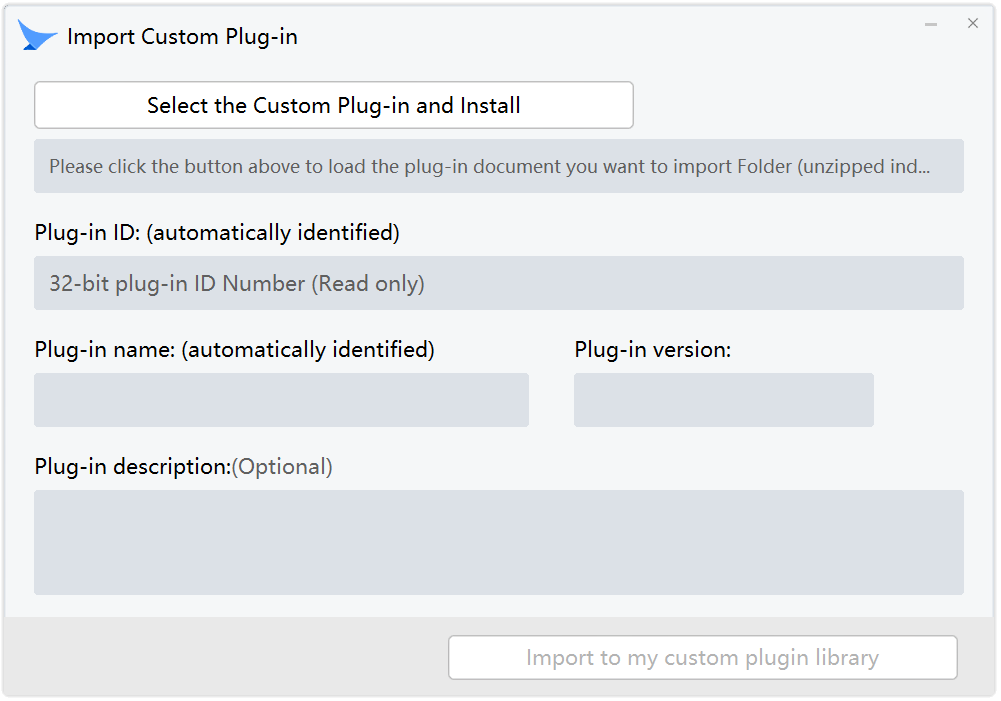
This window indicates that Mbbrowser has begun to prepare itself programmatically to receive the custom plug-in you have given. The operation process does not affect the business environment you have already run, that is, you can run multiple business environments at the same time, at the same time, there will be no conflict.
When you see this window, you can start working with your CRX plug-in package file, unzip the CRX plug-in package into a directory format.
For example: MyProject.crx file, you rename this file to MyPorject.rar or MyProject.zip, and then unzip it with winrar or winzip. When the unzipping is complete, you will see a Myproject folder. At this point, you are ready to import to migratory birds.
4. Then click the button on this window: Select the Custom Plug-in and Install
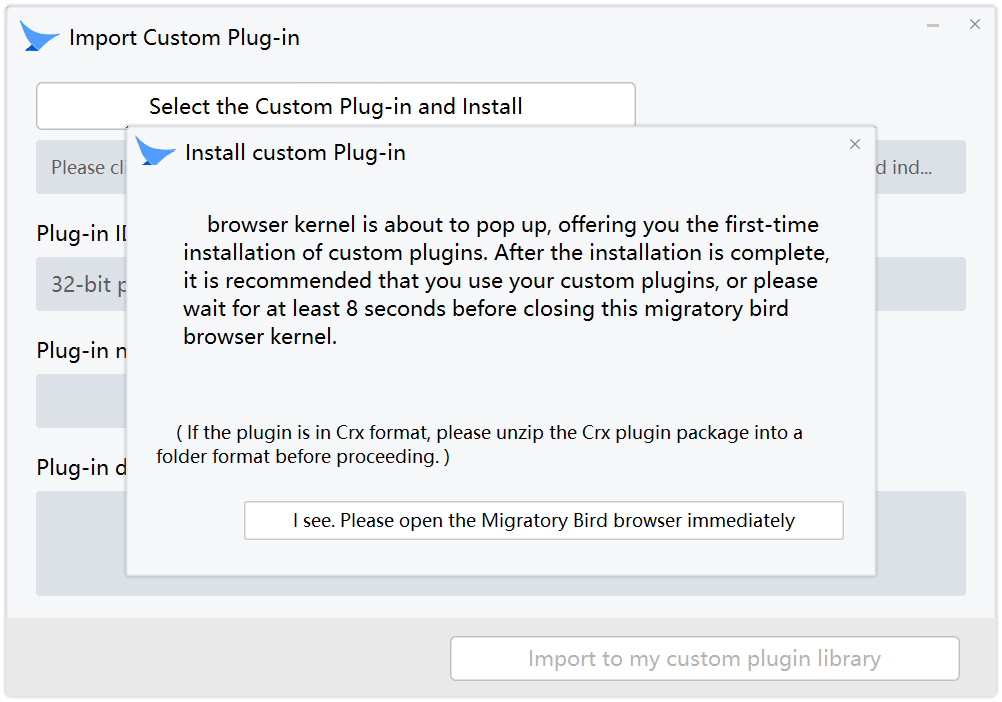
You should see a pop-up window that tells you to make sure you have extracted the Crx plug-in package file into a folder. At the same time, it tells you that the next step will open the Mbbrowser window for you to import the plug-in folder into the browser for verification. The verification process takes 8 seconds. During the 8-second process, Mbbrowser will obtain and verify the ID, name and version number of the plug-in, and finally save it on your hard disk. At the same time, it is stored in the specified location required by GOOGLE according to GOOGLE specifications. The whole process takes 8 seconds, during which time you can use the plug-in in the browser or do nothing, and close the browser after 8 seconds.
5. After you understand the whole process, please click: I see, Please open Migratory Bird browser immediately
At this point you can see that Mbbrowser pops up a browser kernel window for you to add your plug-in, at this time you click:

6. Then select the plug-in folder that you just unzipped. The following illustration:

After the addition is complete, you will see that your custom plug-in has been successfully added to the browser, this way does not require your plug-in to be approved by the GOOGLE Extension Store, and does not require you to submit any review, so that it is your own plug-in.
7. You can close this browser window after waiting or using the plugin you just added for 8 seconds.
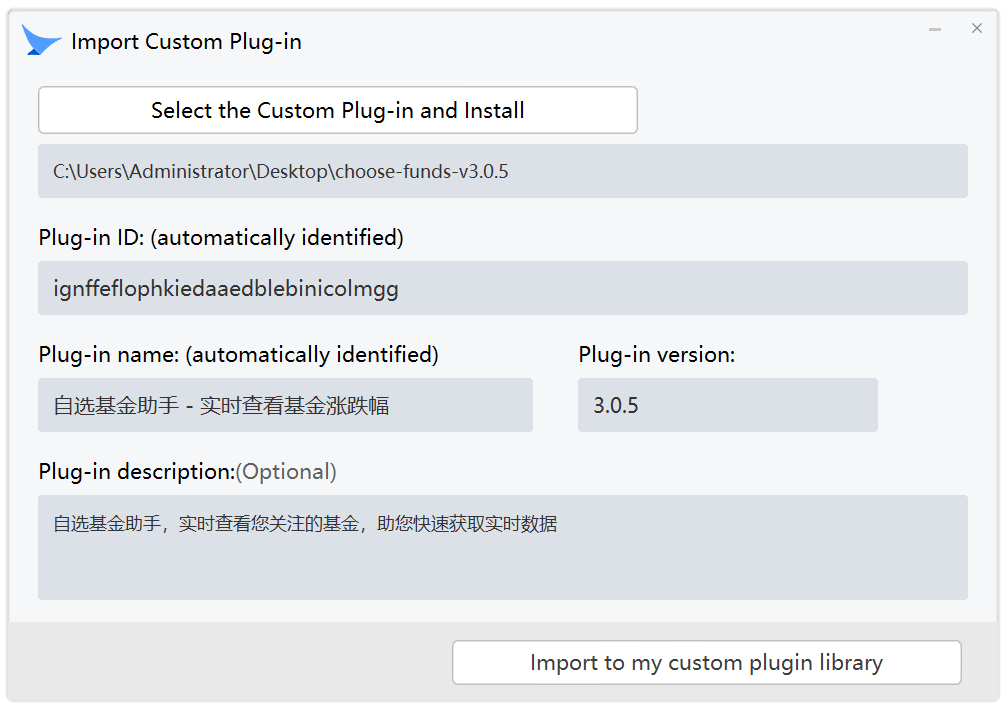
Then you will see that your custom plug-in has been detected and verified by Mbbrowser, successfully obtaining the plug-in ID, plug-in name, plug-in version number. When you see that all of these messages are valuable, the migratory bird detection and verification has been successfully completed.
In order to facilitate management and memory, you can also fill in the plug-in description (the plug-in description will be displayed in the custom plug-in list bar), or you can not fill in.
8. Then click Import to my custom plugin library
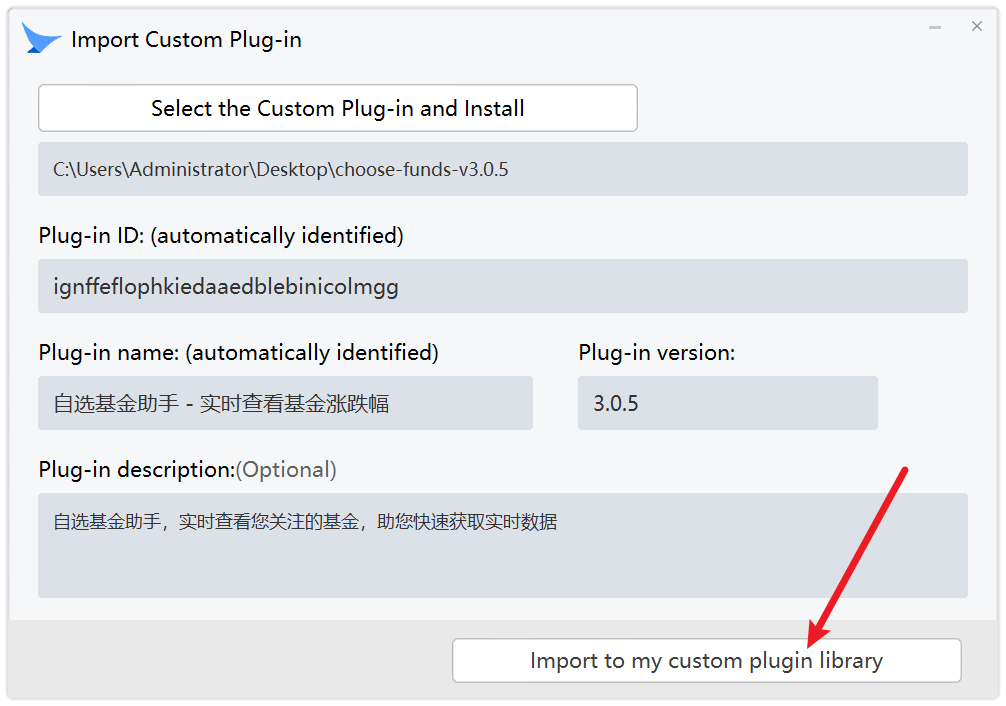
This means that your custom plug-in has been successfully imported into your private plug-in library, in order to protect your personal privacy and business security, all such plug-ins only exist in your local computer, there is no other place, and will not be synchronized to the official server of Mbbrowser. Therefore, when you use it in a remote computer in the future, if the custom plug-in does not exist, you still need to perform the above import operation.
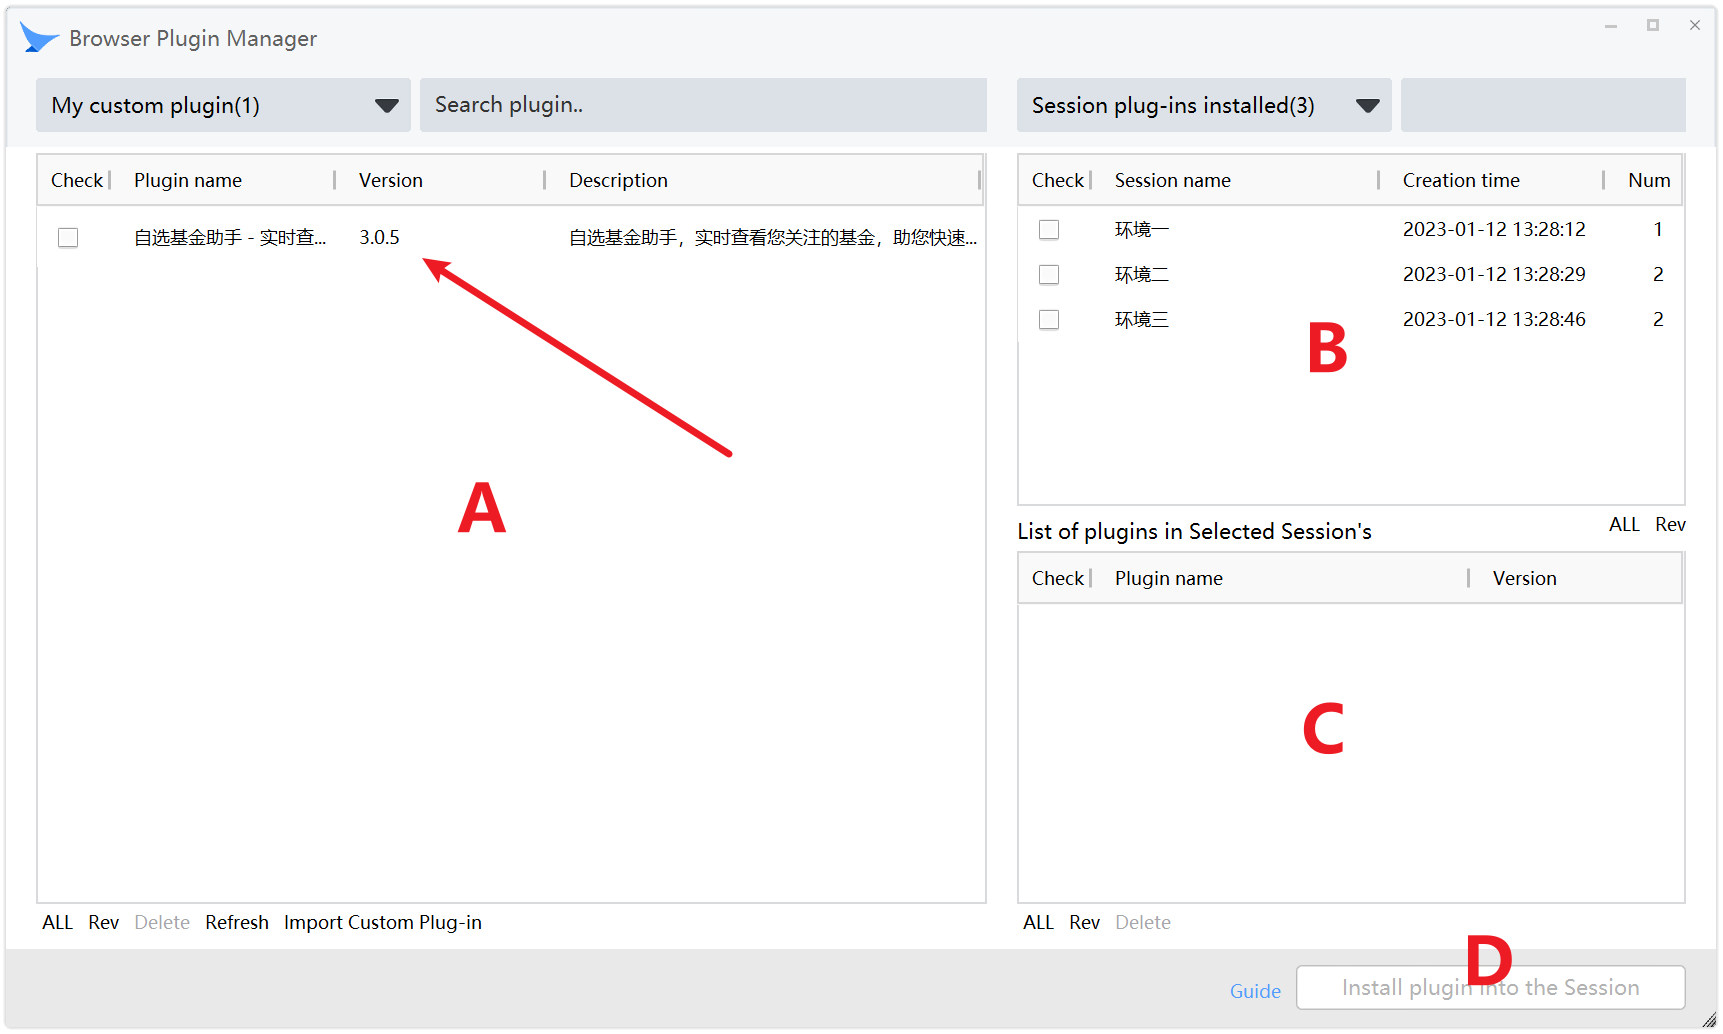
9. At this time, you can now follow the standard general operation of mbbrowser, in the order of A,B,C,D, by checking (ticking), any custom plug-in one-key batch installation (assignment) to the multiple environments you need, avoiding the tedious manual installation of plug-ins one by one.